
A couple of years ago, I bought my grandchildren an Elf on the Shelf gift set. They named their elf, Eli, and he has been the source of great joy and fun each December on the run up to Christmas. This year my daughter-in-law phoned me and asked me if I’d like to make a sleeping bag for Eli. They were going to tell the kids Eli had flown down to Cornwall (from Kent) to see Nanny and Grandad and while there, Nanny made a nice warm sleeping bag for him. It was a fun way to involve us since we live so far away.
I loved making this especially as it was for my grandkids and it also reminded me of when I was little. My Mum used to make clothes and furniture for my Sindy doll. She made a similar sleeping bag but used glue instead of stitching.
This is a fairly simple and fun sewing project to do so I thought I’d share it here with you.
They’re perfect for any toys, not just Elf on the Shelf. I’m going to be making a couple more for my granddaughter’s dolls.
Supplies - you will need fabric, wadding, matching thread, scissors or rotary cutter, ruler, pencil and paper. I used my sewing machine but it’s a small enough project to create by hand.
This is a good stash busting project depending on the size of the doll of course! I used some fabric from my Merryn collection as it was what my daughter-in-law wanted but you could use Christmas themed fabric or themes that you know the kids love.
I used 2 contrasting fabrics or you can use one for the whole sleeping bag. It’s whatever you prefer.
1. To work out how much fabric you need to cut, measure the toy’s length and width. I didn’t have the Elf on the Shelf with me so my daughter-in-law sent me the measurements. You need to add approximately 2 inches on the width to allow room for the doll and seam allowance. For the length, you need to add approximately an inch plus how much you want to have for the cover part of the sleeping bag. For example, I added an extra 9” to mine which included the seam allowance and cover.
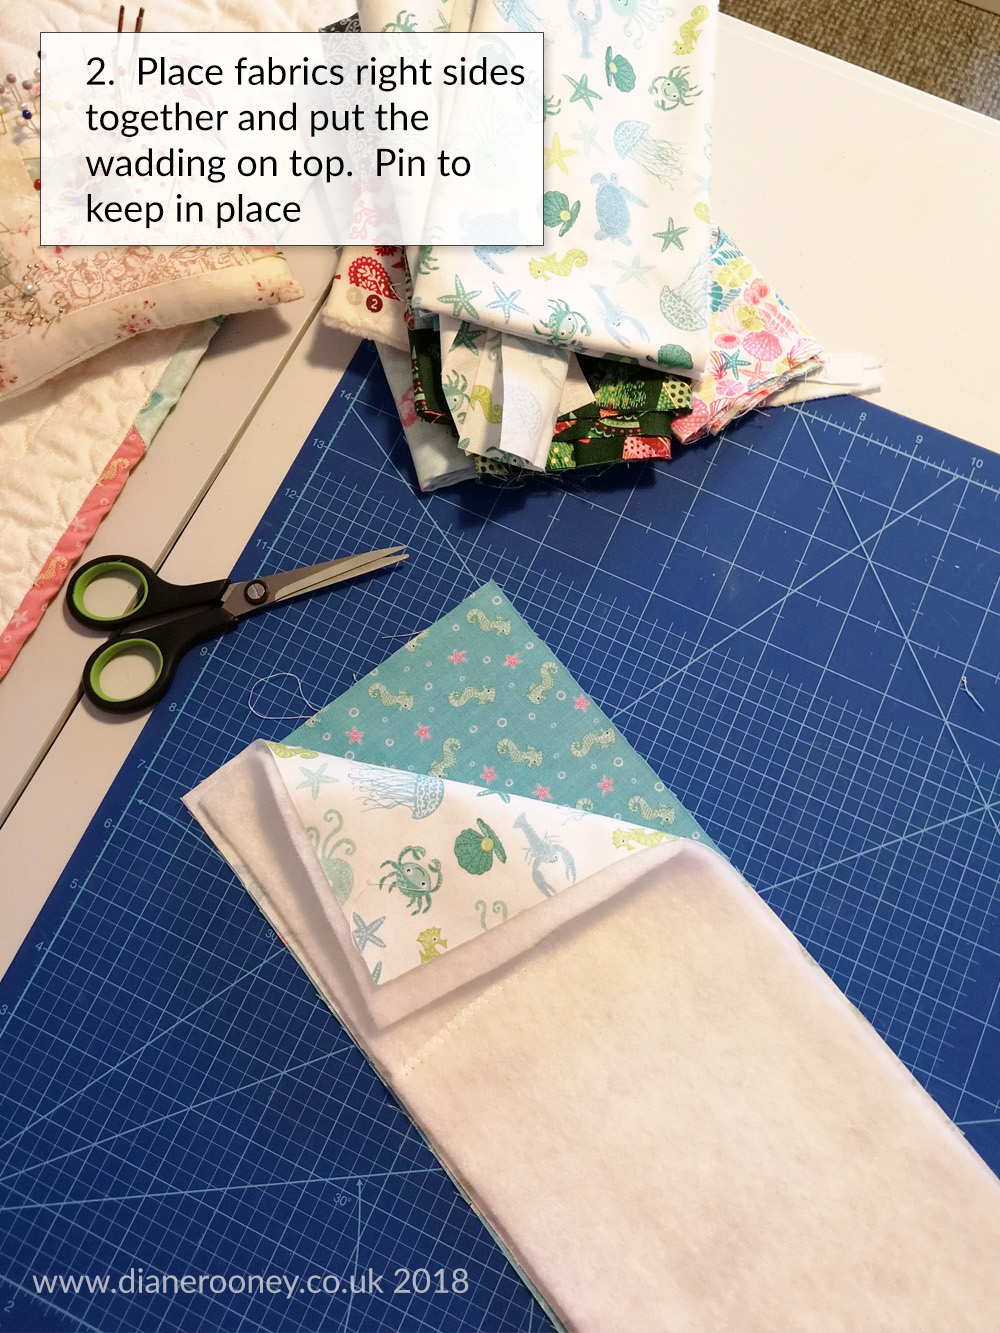
2. Cut the fabric according to your sizes in the previous step. You need 2 pieces of fabric plus the wadding. Place your fabric right sides together and put the wadding on top. Pin to keep in place.
3. Sew all the way round leaving a couple of inches open so you can turn the sleeping bag right sides out. Start sewing about half way down one side. This will make it easier for turning the sleeping bag right side out when finished. Be sure to do a back stitch when you start and finish so the stitching doesn’t start coming undone when you turn the sleeping bag right side out.

4. Once you’ve sewn all the way round, using your fabric scissors, cut each corner. This reduces the bulk for when the sleeping bag is turned right sides out. Be careful not to cut the stitching.

5. Carefully turn the sleeping bag right sides out. This can be a bit fiddly. Go slow and pull out a little at a time. Use some blunt ended scissors or a point turner, poke the corners so they’re as neat as you can get them.

Now give the sleeping bag a good press. Make sure the opening where you turned the sleeping bag right sides out, has been pressed well for the next step.

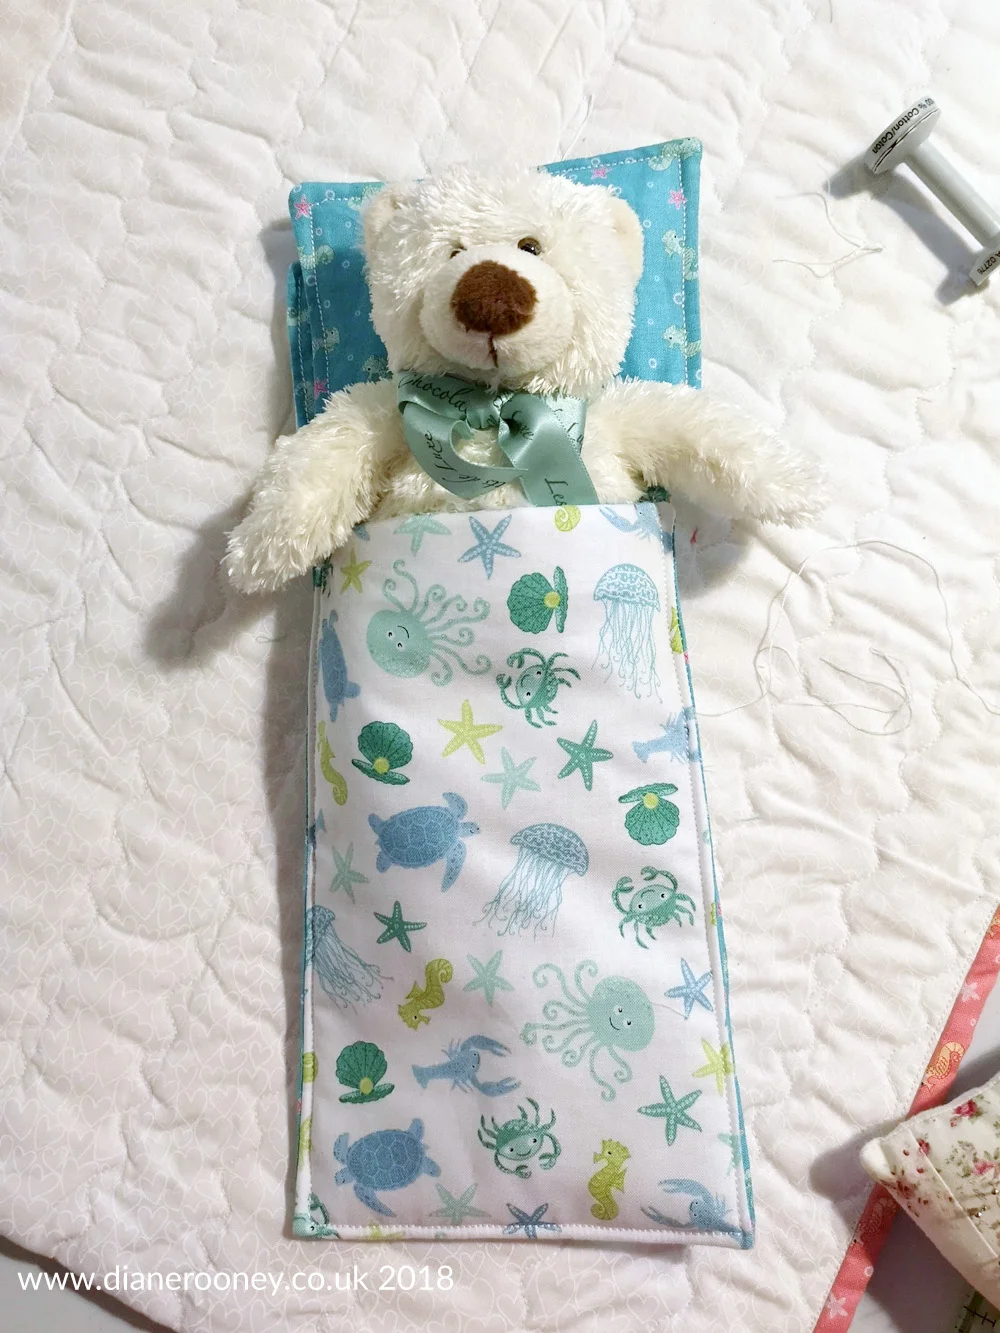
6. Decide which fabric is on the outside and how far up you want the cover. Once you’ve done that, fold it up and pin to keep in place if you need to, and then sew all the way round with a quarter inch seam. Because of the bulk and depending what wadding you used, you may need to use a walking foot for this stage. I didn’t need to but it really depends on your machine.
And that’s it. I made a simple little pillow to go with mine by measuring the top part of the sleeping bag and using the same techniques as the sleeping bag to sew together.
Hope you enjoy making your kids (or grandkids) some little sleeping bags for their Elf on the Shelf or other toys. I’d love to see what you make so please either leave a comment or tag me on my Facebook page or Instagram.