
Tutorial For Sewing My Book Pocket Cushion Cover Fabric Panels
Please Note (April 2022 UPDATE): this tutorial was initially created for my Christmas Panel (2019) designed exclusively for my local sewing/fabric shop. These panels have now sold out and no longer available from there.
I have designed some more and they will be available very shortly from my Spoonflower shop. Please sign up to my newsletter for updates. Thank you!


Puddles & Boots Cushion Cover Fabric Panel is available exclusively from The Sewing Studio - click this link to buy from their online shop
The Christmas fabric panel comes in two colour ways - Traditional and Modern. They are 100% cotton calico and digitally printed using Digital Pigment Inks. No water is used in the process making them environmentally friendly. Each panel will make an approx. 14” (approx. 35 cm) cushion cover.
They are available exclusively at my local fabric shop, The Sewing Studio, for just £9.95 per panel/design. Click the following links to go to their online shop
Important Notice: While I make every effort to ensure all the instructions on my designs are correct, unfortunately errors are sometimes made. Instruction no. 5 on the panel should say “wrong” side down, not “right side” down. The tutorial here has the full and correct instructions. The original design has also now been amended. My sincere apologies.
Supplies to make the panel:
sewing machine
sewing kit including thread
scissors (or rotary cutter)
ruler
pinking shears or pinking rotary blade. Pinking shears are for tidying up the hem and prevent fraying. There is an alternative in the instructions here that don’t require them if you don’t have any.
How to Make Up the Cushion Cover
1. Prepare your fabric by washing it at 30degrees. Do not tumble dry. Gentle iron or press once dry. Cut out each piece of the cushion and press. Tip: cut out the labels and pin to corresponding piece if it helps figure out the different pieces.

2. Back Panels - these will make the envelope back. Create a double hem by folding an approx. 1/4” over twice , press and sew, on the longest side (38cm) on each back panel.


Sew straight stitch on each of the back panels to create a neat seam
3. Pocket - Fold the pocket piece in half, press and then sew about 1/4” from top of fold to create a nice neat hem. It also makes the pocket more stable rather than using 1 piece of fabric.

4. Pin the pocket piece to the front panel making sure the folded sewn piece of the pocket is in the middle

5. Carefully place the sewn front pocket piece wrong face down. Place the back panels on top of the front pocket piece (right sides together) making sure the hemmed pieces are towards the middle. Pin. They will overlap as this is what creates the envelope back.

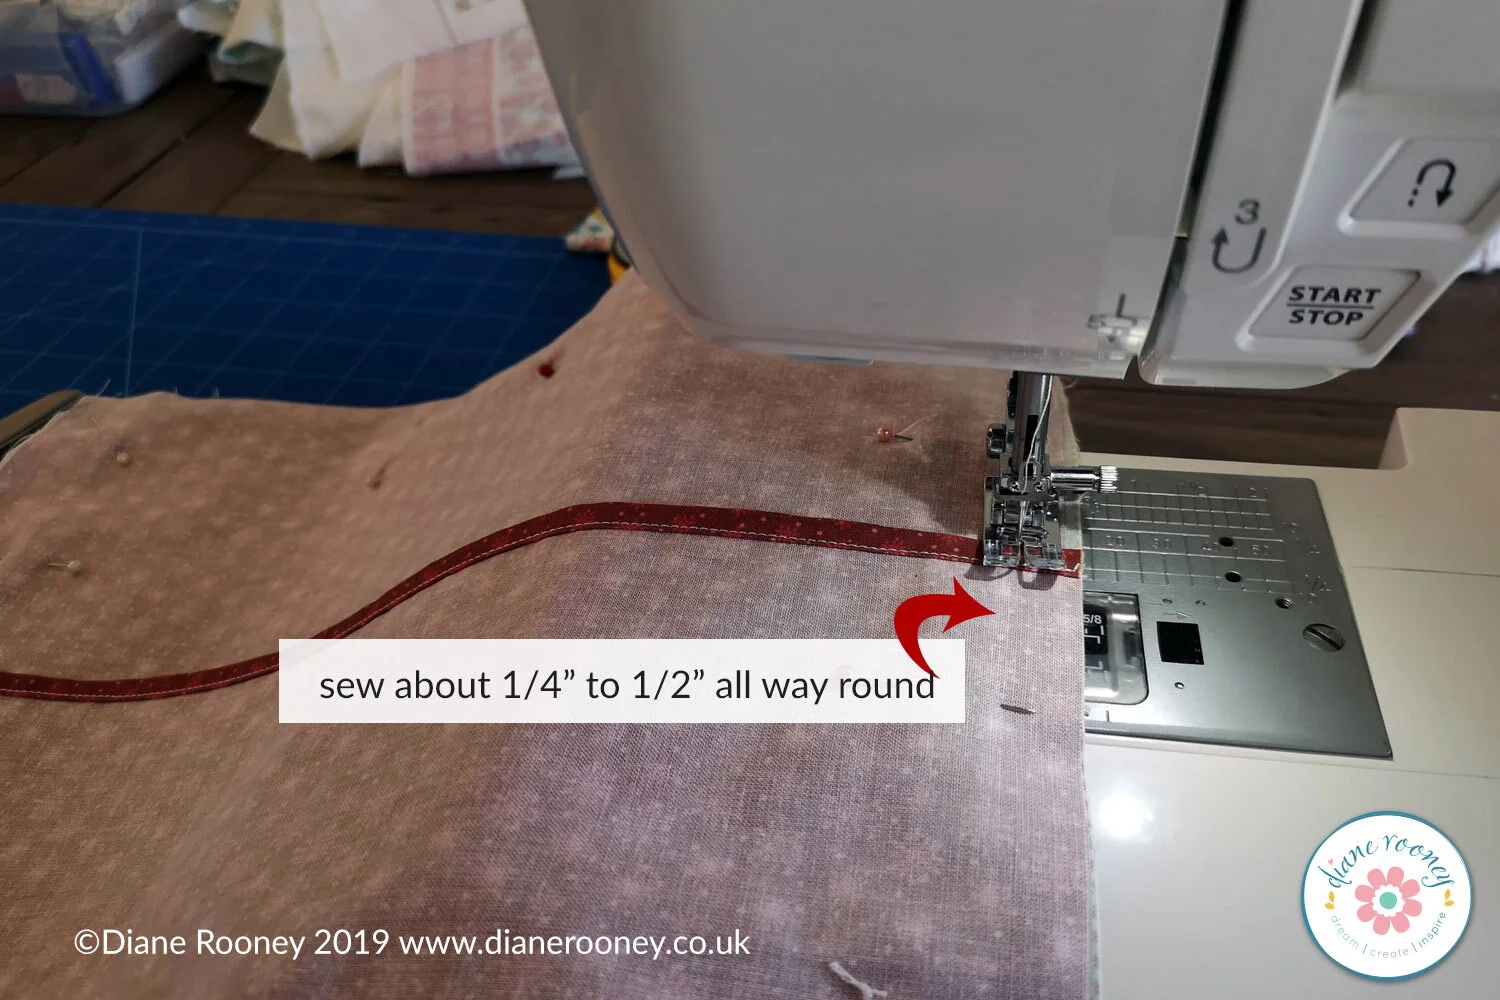
6. Carefully sew approx. 1/4” to 1/2” all the way round. Remove pins.
7. Press all the way round.
8. To tidy up the edges, either trim with pinking shears or you can sew a zig zag stitch all the way round and then trim off excess fabric taking care not to cut into the stitches. You can also use an overedge foot, if you have one. The idea is to tidy up the edges to prevent fraying as much as possible.
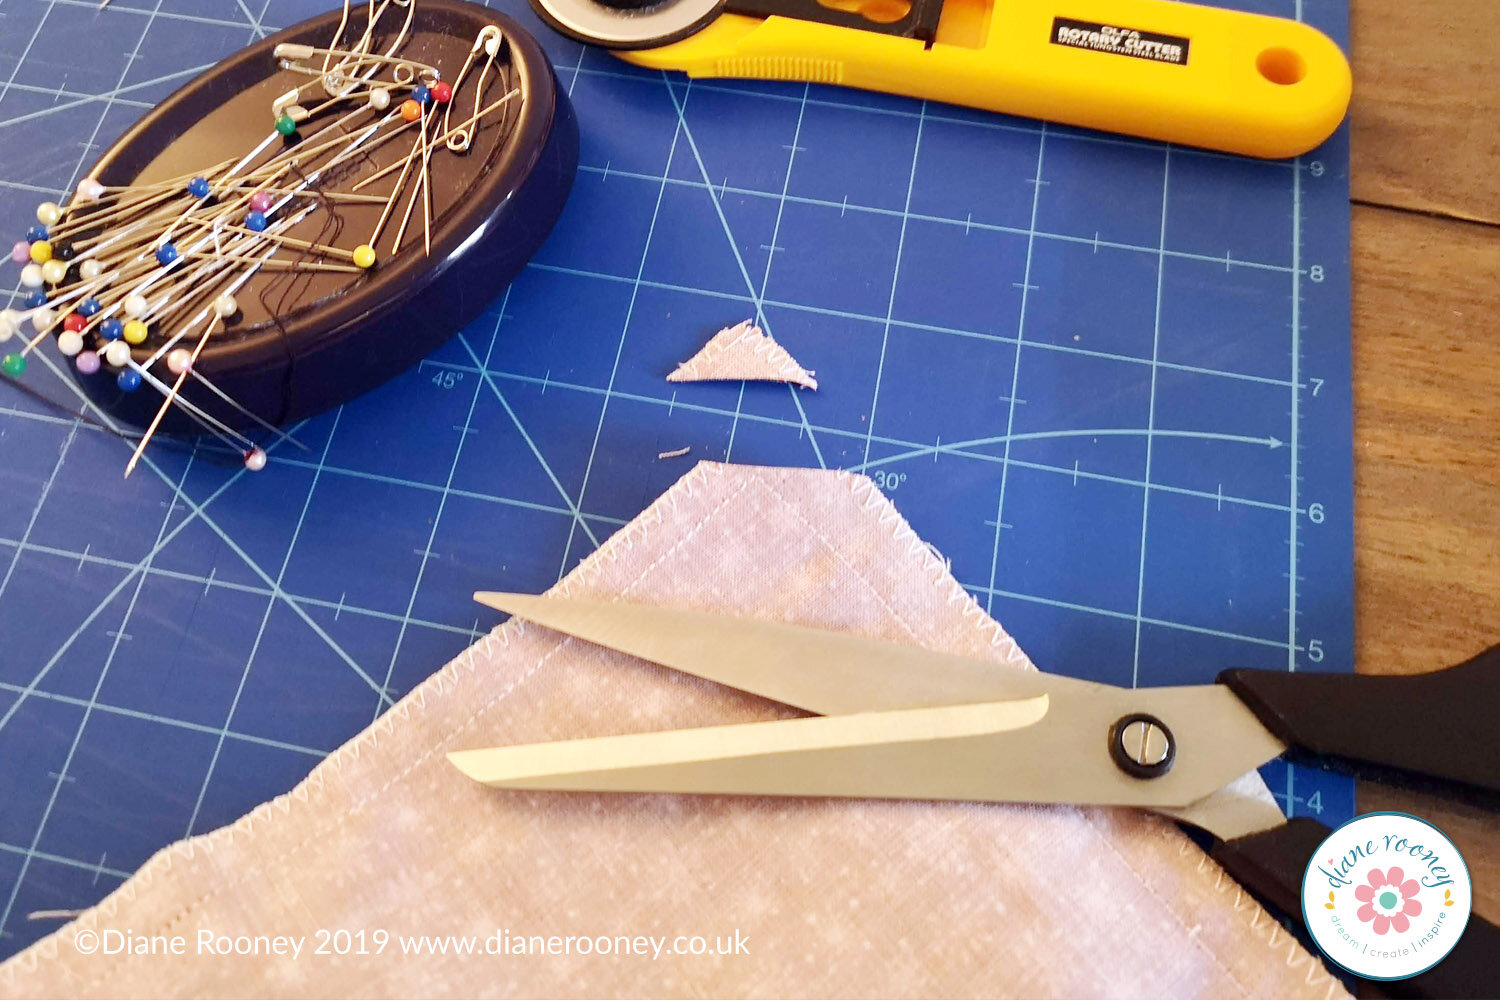
9. Once you’ve done your edges, press. Cut off each of the corners taking care not to cut into any stitches. This will reduce bulk when turning right side out.
10. Turn the cushion cover right side out carefully pushing the corners right out. Carefully roll and press all the way round. And that’s your pocket cushion cover made. Get a 14” cushion pad. A 12” or 13” will also be ok - it depends how snug or loose you like your cushion covers.
