
Important Update: Covid-19 - If you’re making these bags for nurses to put their uniforms in at the end of their shifts, please wash your fabric first to make sure it’s colour fast. You can also adjust the size as needed to make the bag a little bigger e.g 50cm x 50cm. Check with the hospital or organiser to find out what size is needed. (April 4th 2020)
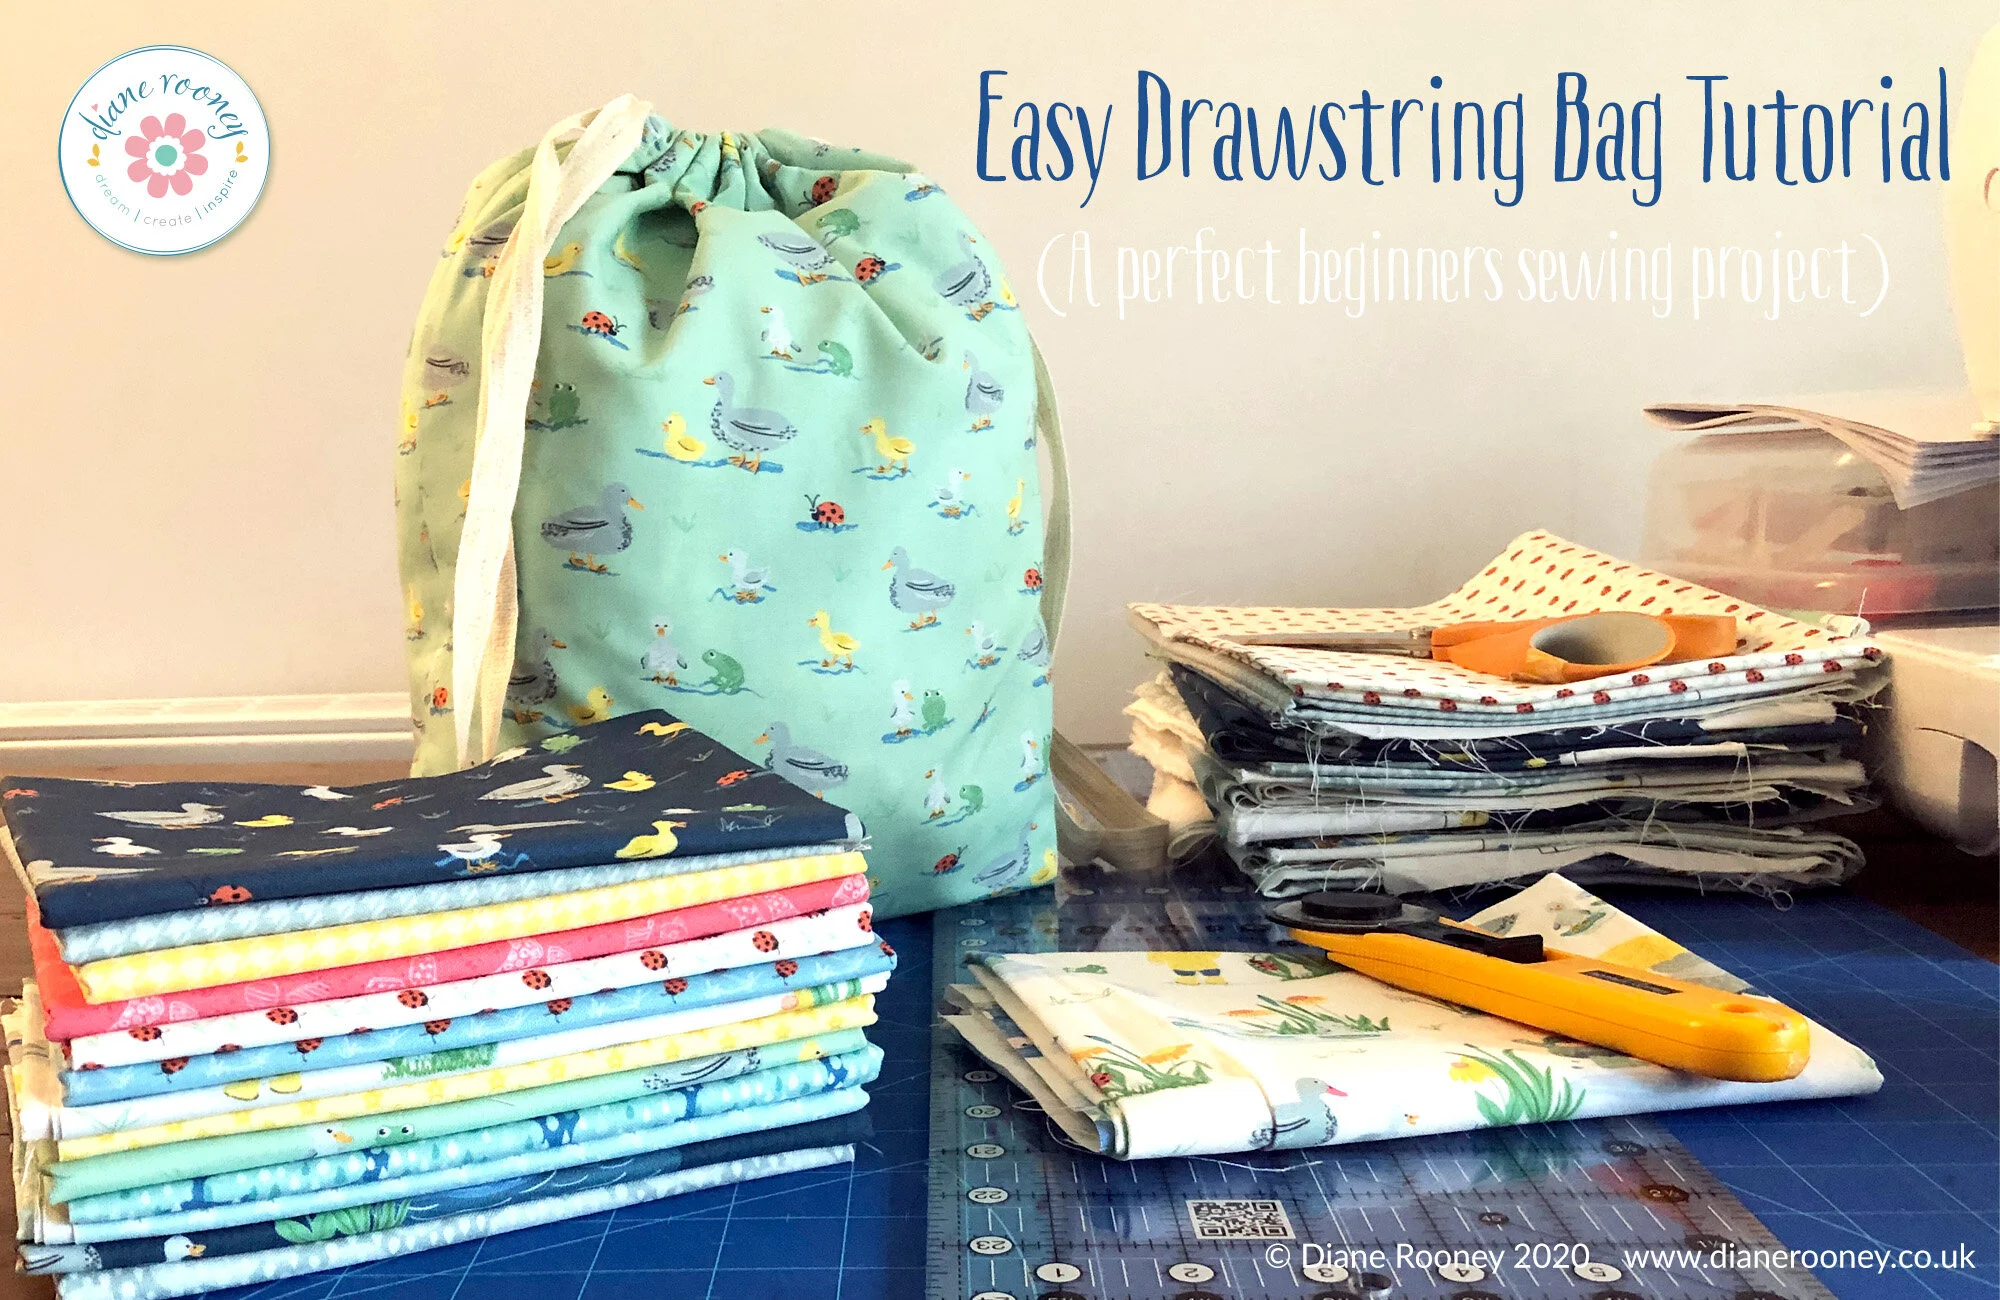
Introduction. This is a lovely, easy sewing project to make a simple drawstring bag. Perfect for beginners. I have created this bag using fabric from my latest collection, Puddles & Boots. You can use any fabric that’s 100% cotton. I have assumed that you have some basic knowledge of your sewing machine. Please refer to your sewing machine manual as required.

Supplies. 2 pieces of fabric approximately 14” (36cm) x 18” (46cm), scissors or rotary cutter, ruler, ribbon or cord, pins, a safety pin and sewing machine with thread. I have used white thread for this tutorial but you can match thread to your chosen fabric colour.
Notes: Finished size of my bag for this tutorial is approximately 12”(30cm) x 15” (38cm). You can make these bags any size you want. Decide on your finished size and add 1” to the width and approximately 3” to the length. I recommend you wash your fabric before use. Please read through this tutorial before starting.
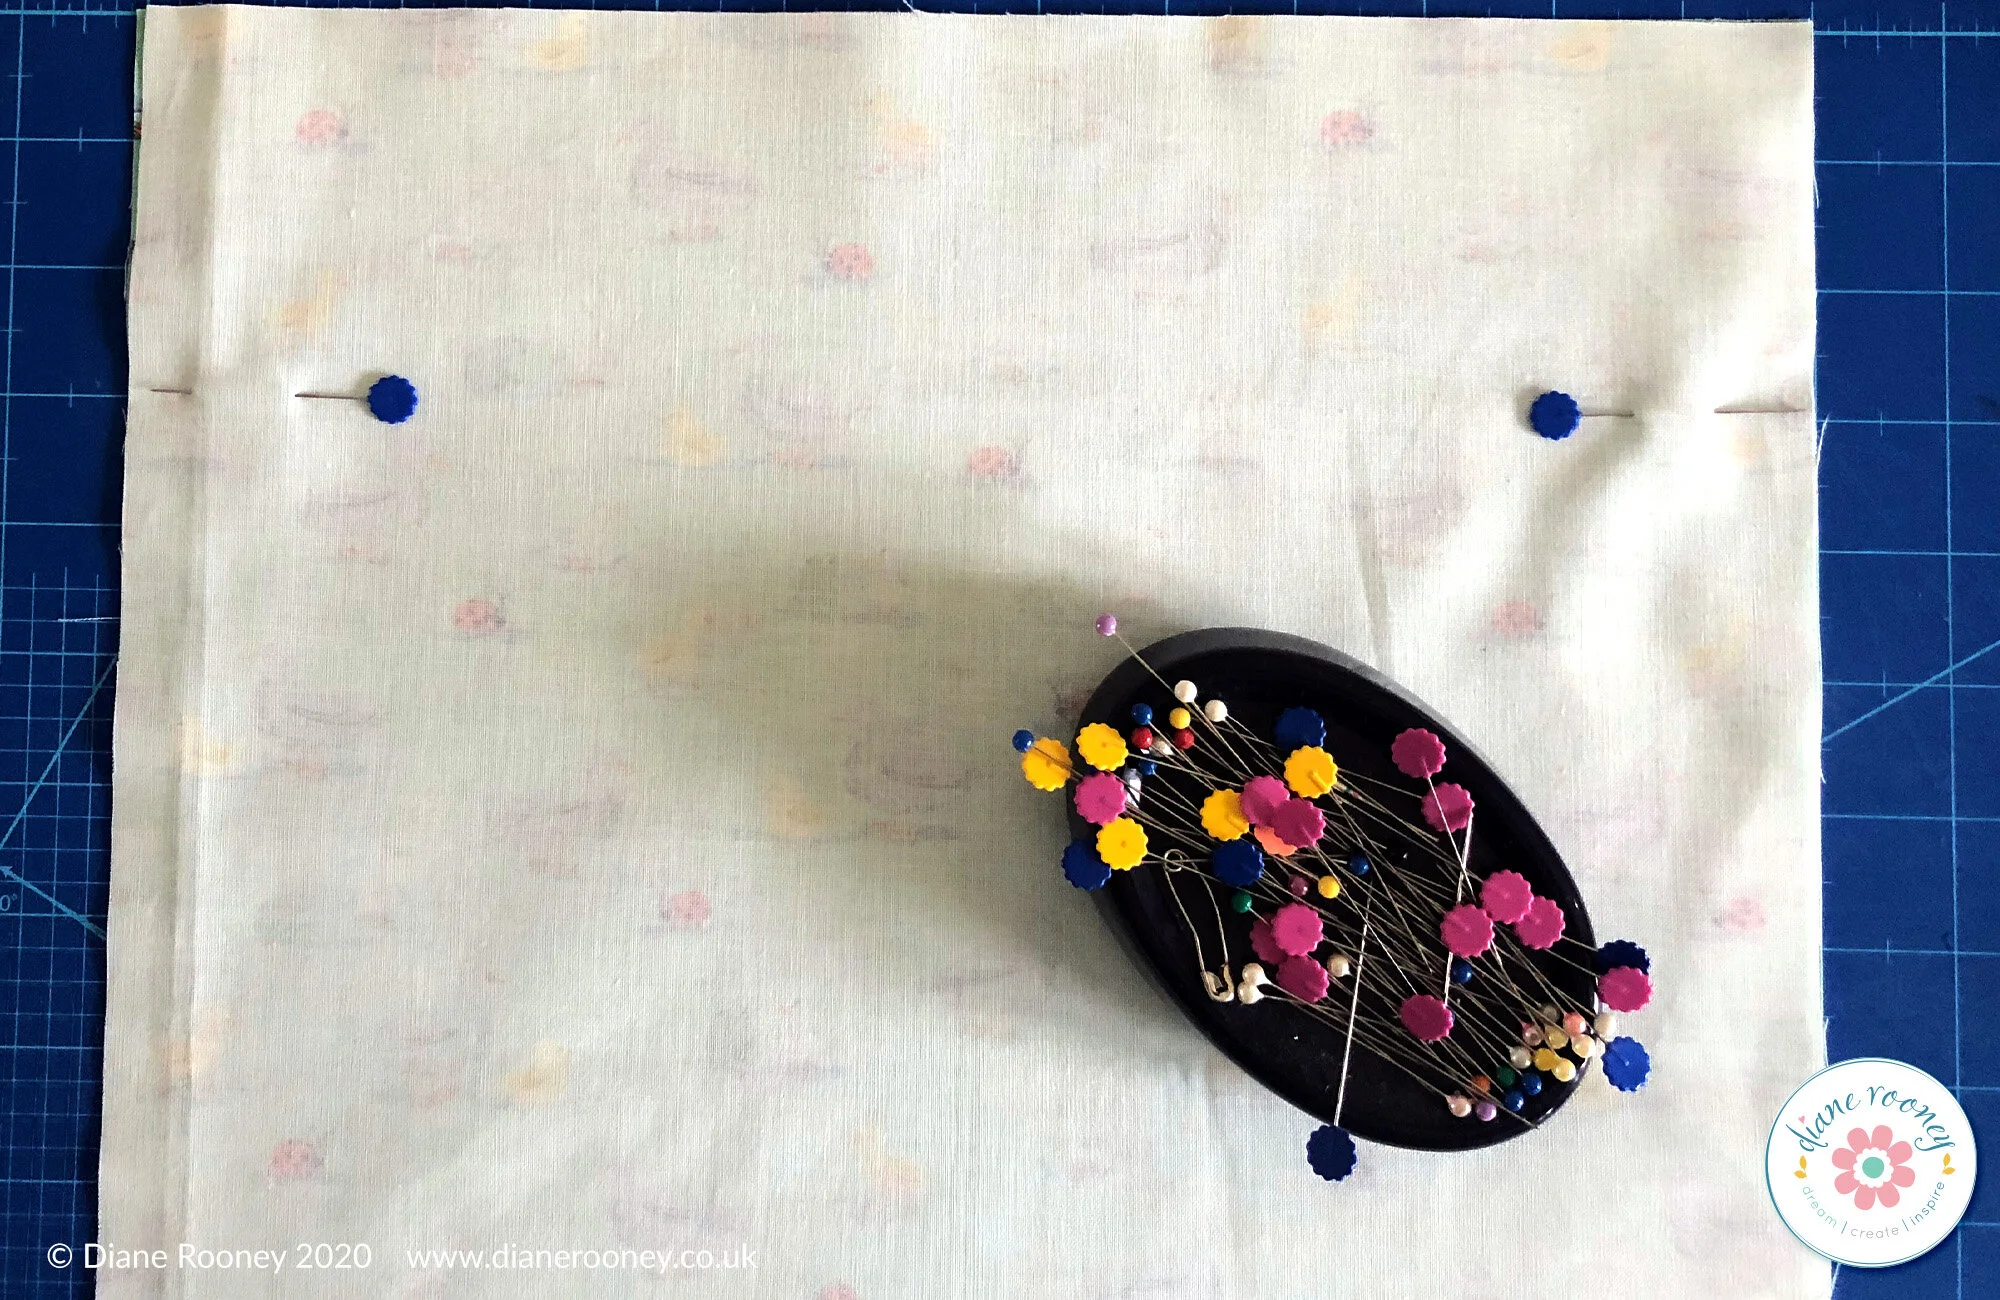
1. Press your fabric. Cut to the required size. For this tutorial, that will be 14” x 18”. Place your 2 pieces of cut fabric, right sides together and mark with a pin approximately 3” down from the top on both sides of the fabric (see image). Please note: if you have a directional pattern (like I do) take care to make sure both pieces are in the right direction before placing them right sides together and pinning.
2. Now pin the fabric pieces together (see image) and sew all the way round 3 sides starting from the 3” mark round to the other one.
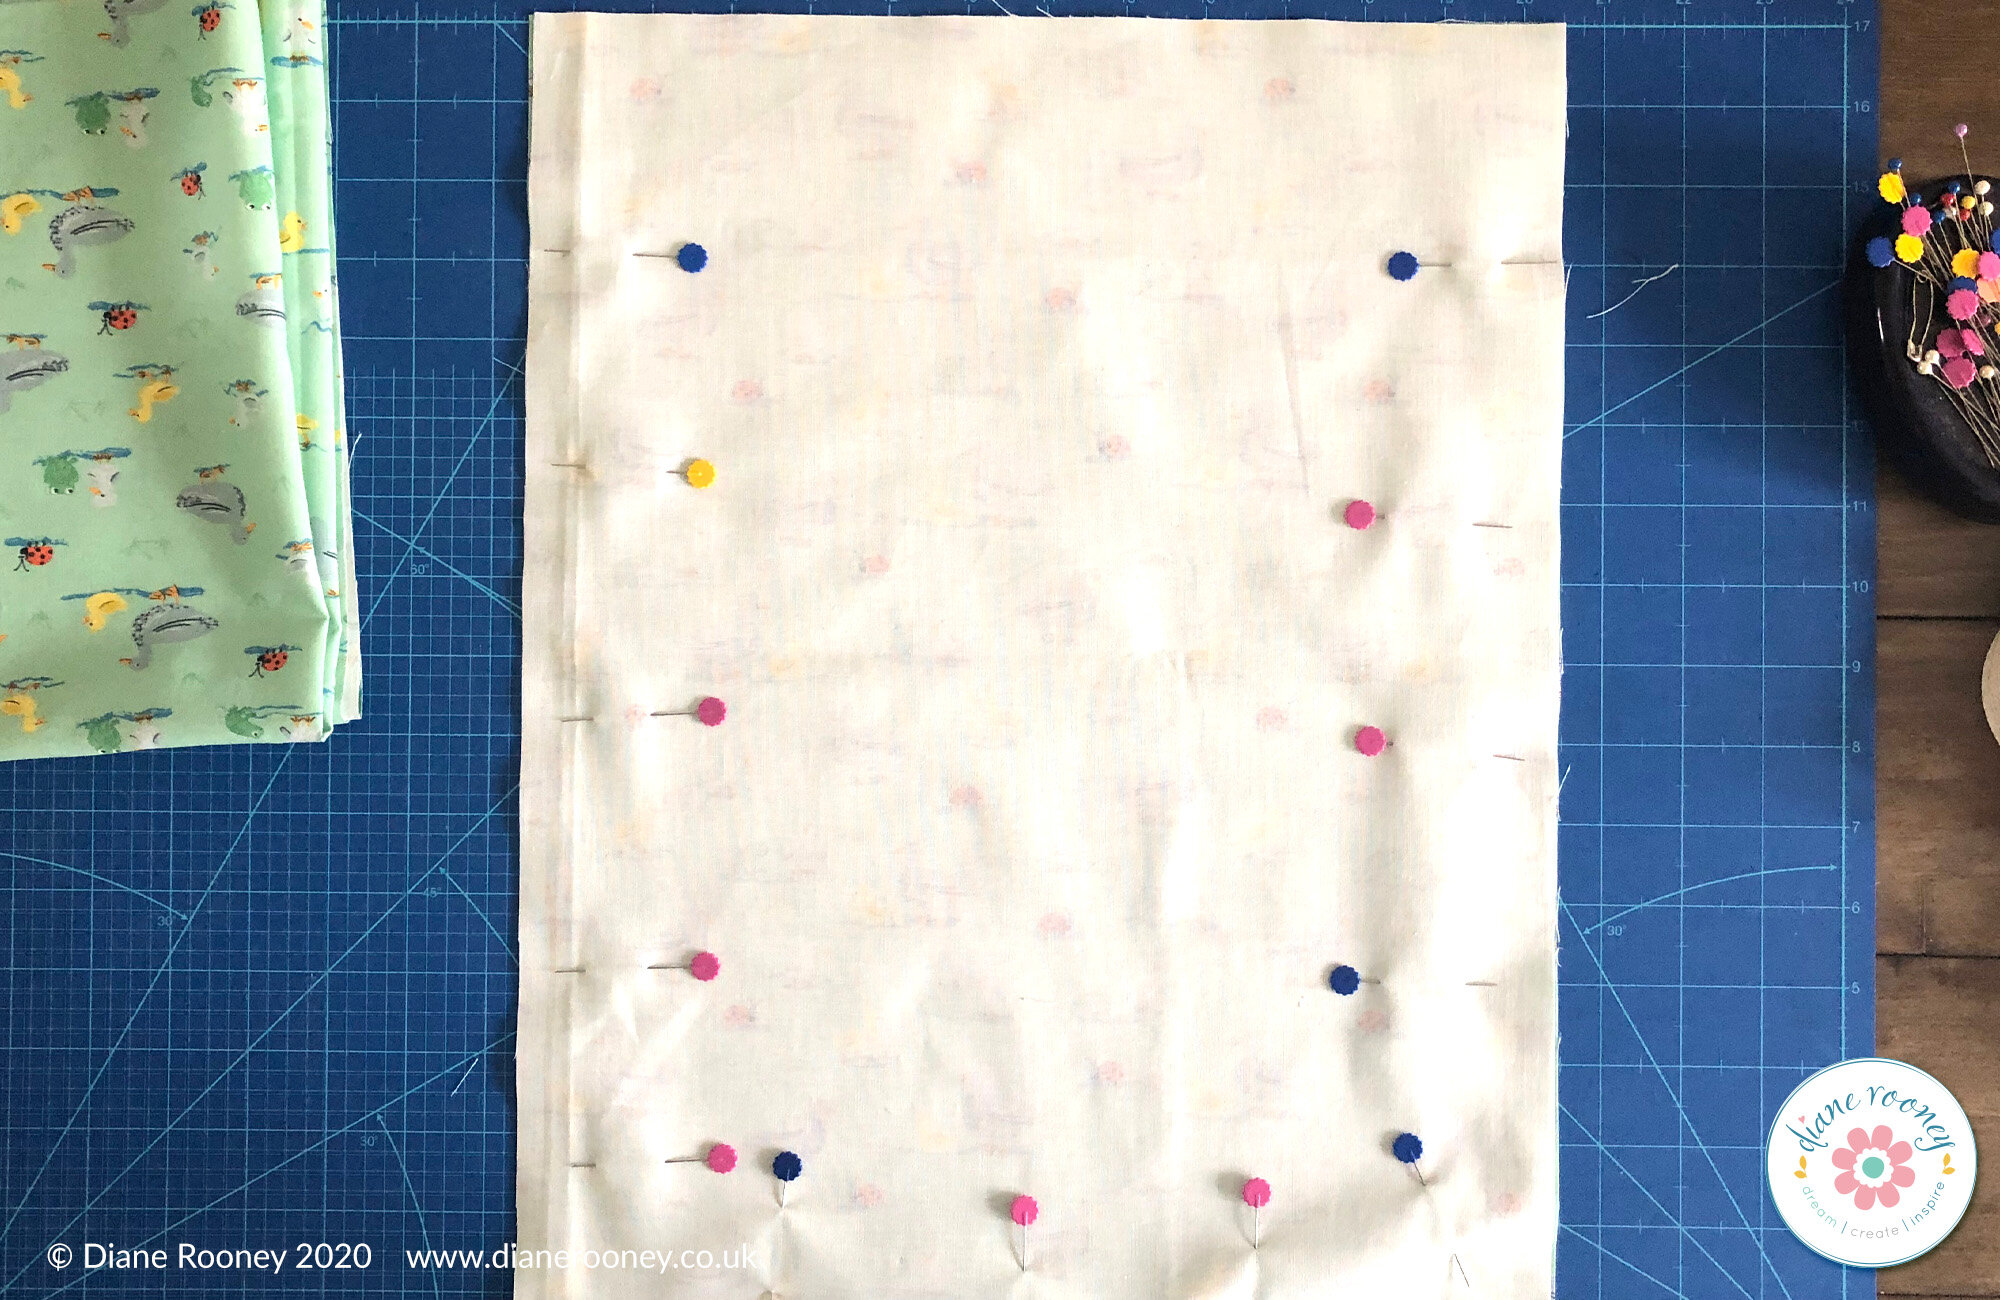
3. Sew from the first mark/pin all way round the 3 sides to the other mark about a 1/2” seam allowance. Backstitch at beginning and end to reinforce.
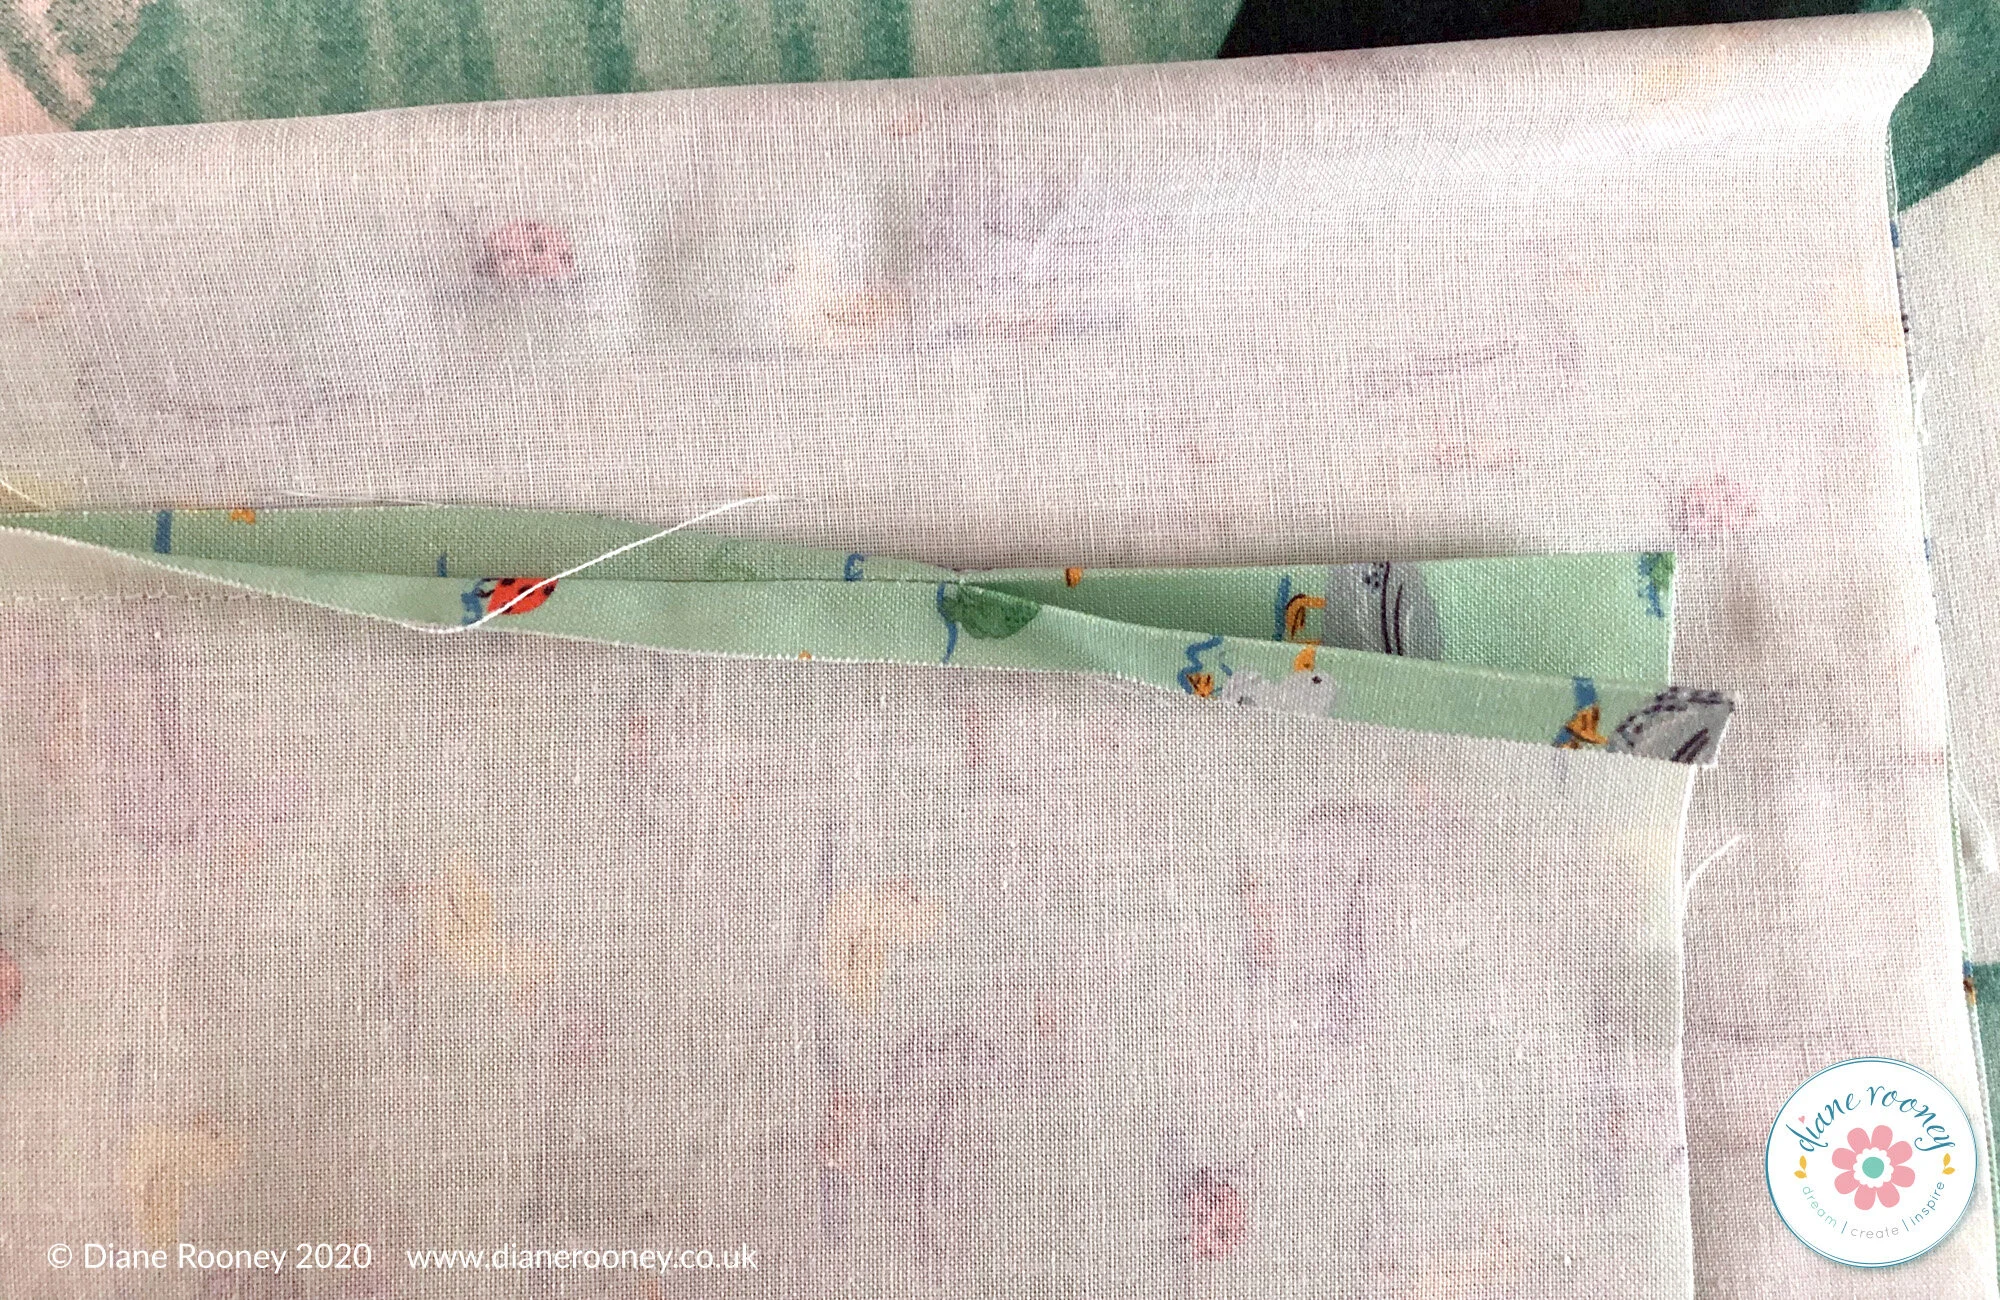
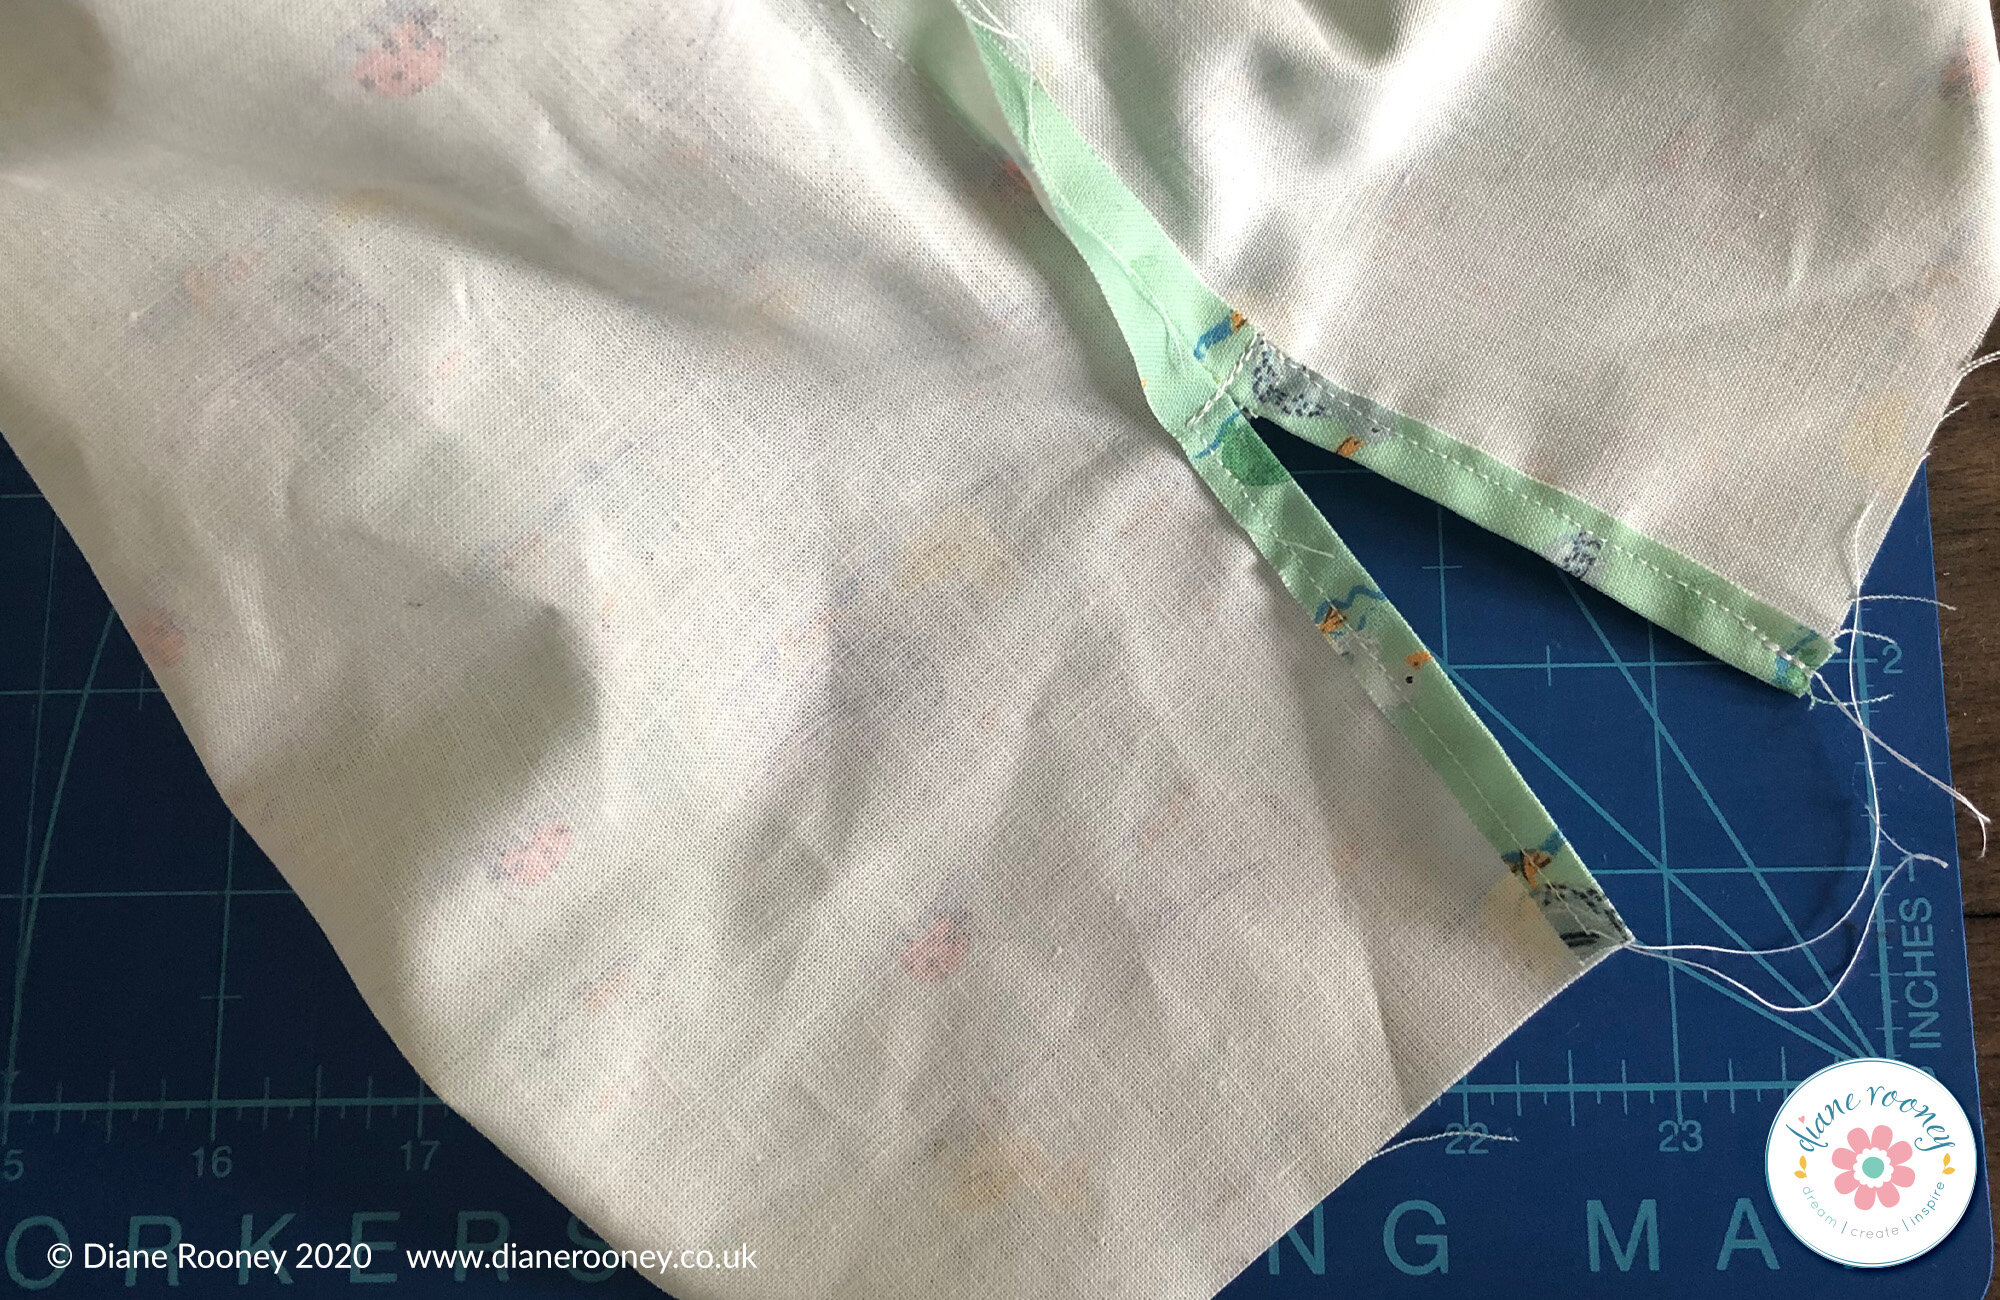
4. Fold and press the side opening at the top about 1/2”. Press open the seam to help if needed. Do this on both sides of the bag. You should have a kind of “V” shape once pressed.
5. Stitch down one side of the “V”, across and up the other side. Backstitch to reinforce at beginning and end.
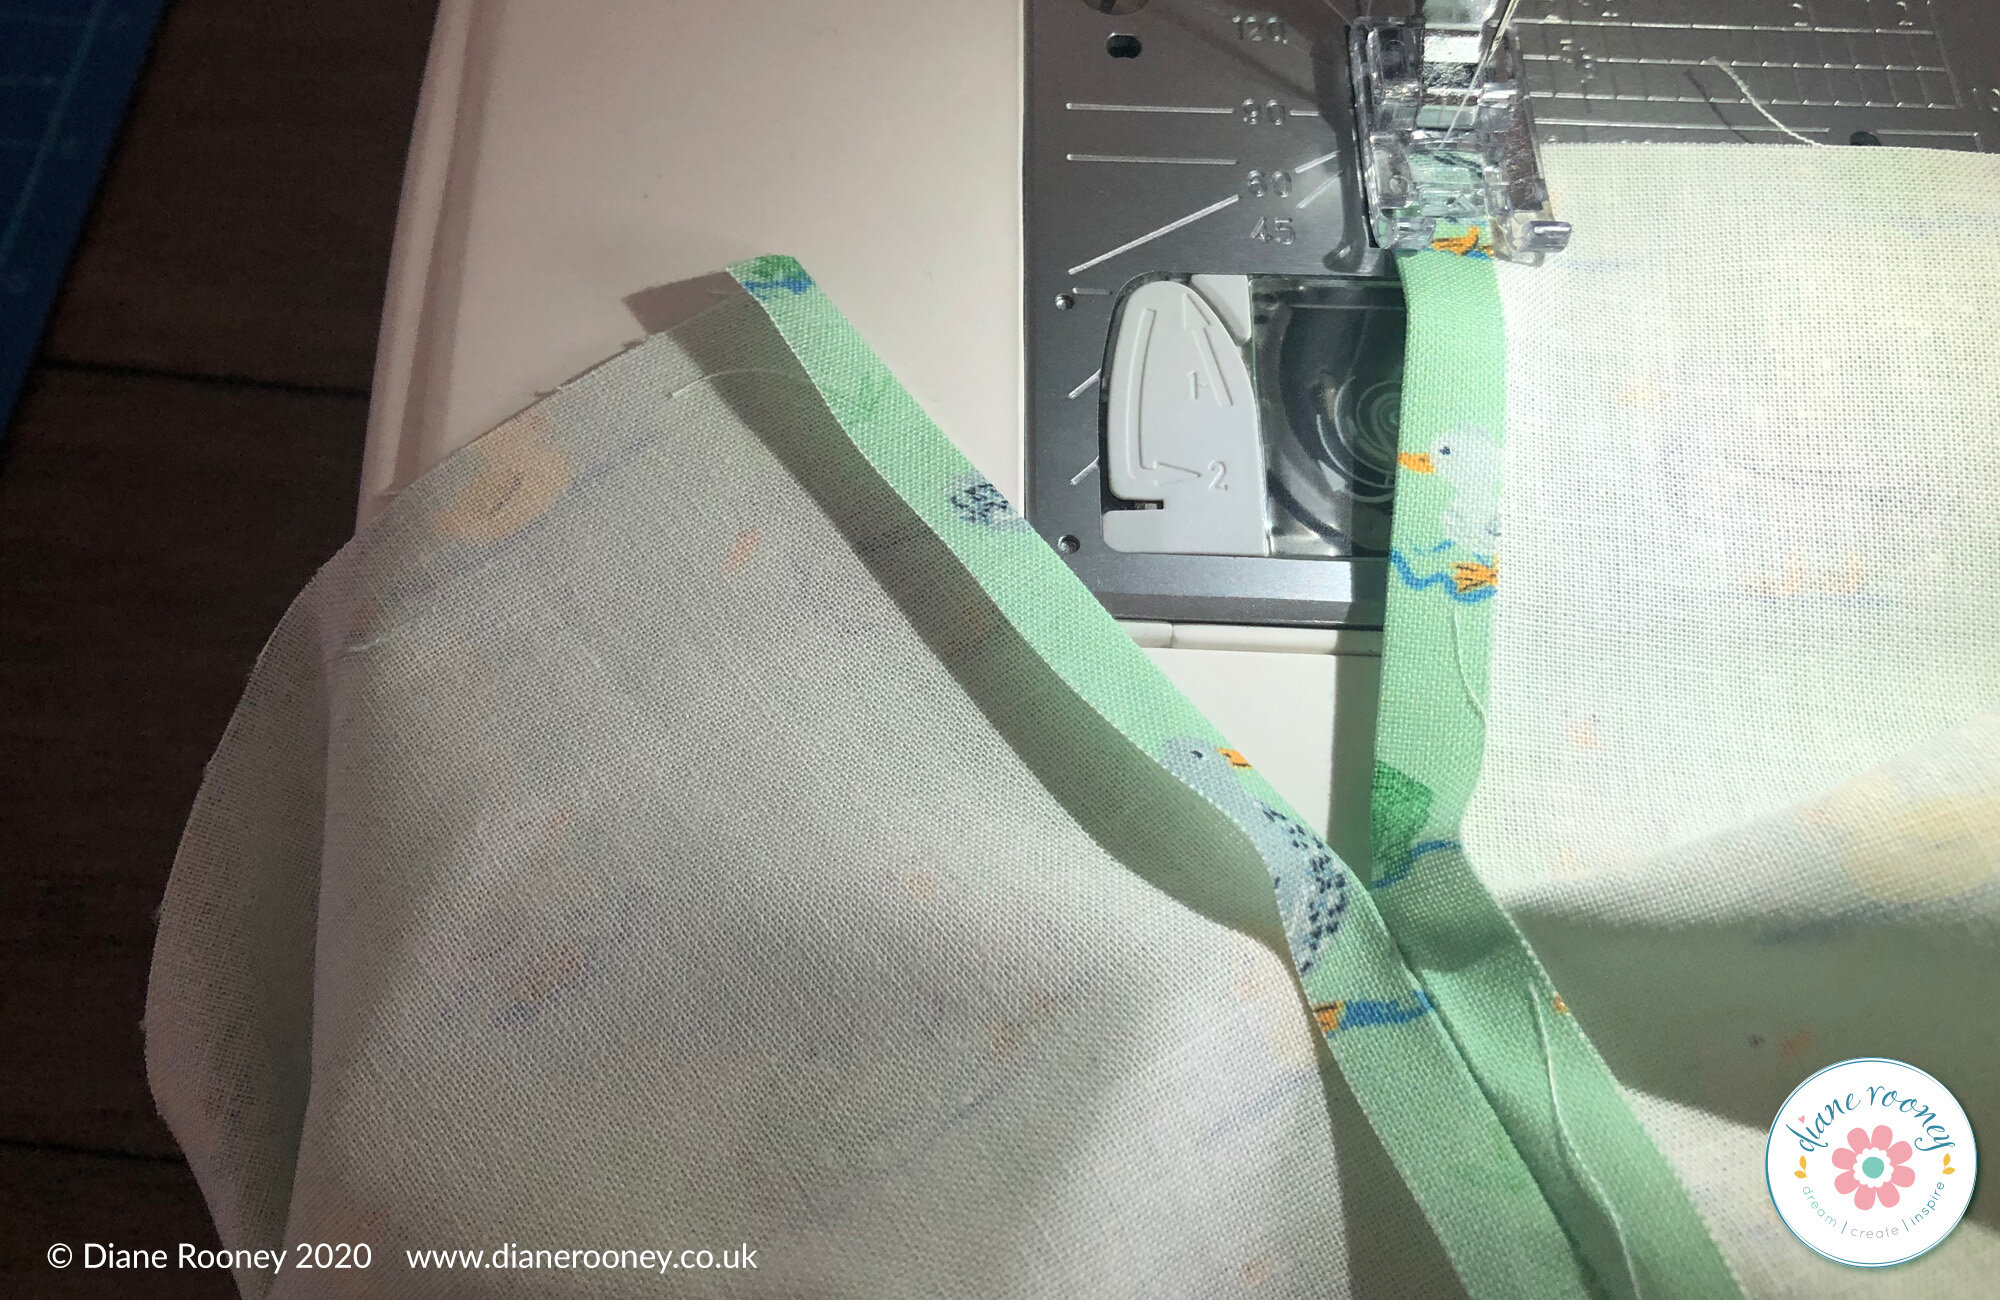
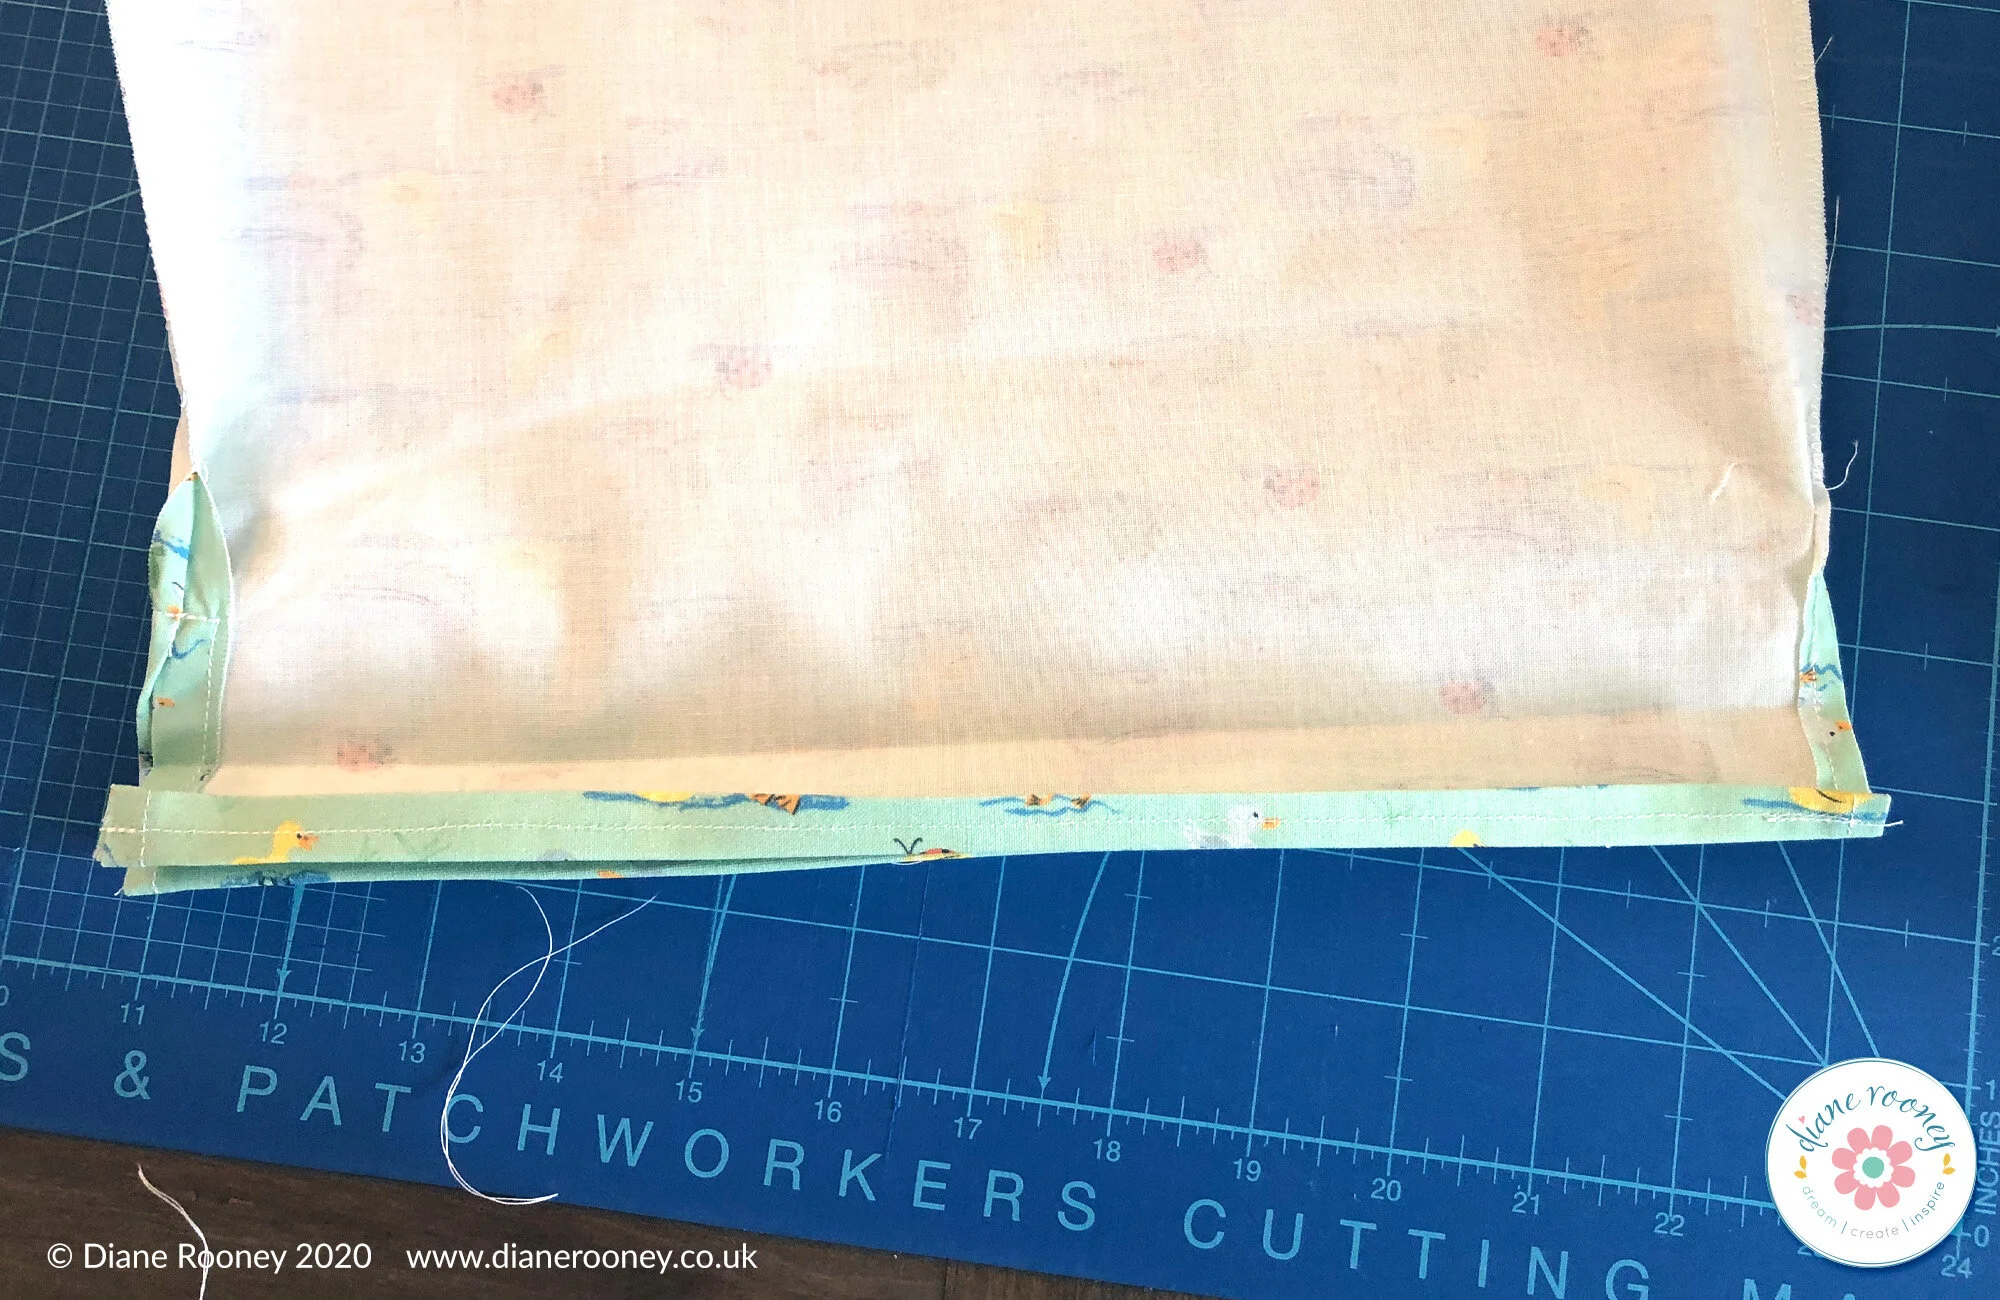
6. Fold over the top of the bag (opening) where the raw edge is approx. 1/4” to 1/2”. Press. Pin. Sew. Repeat on the other side of the bag. Take care to move any fabric underneath when sewing.
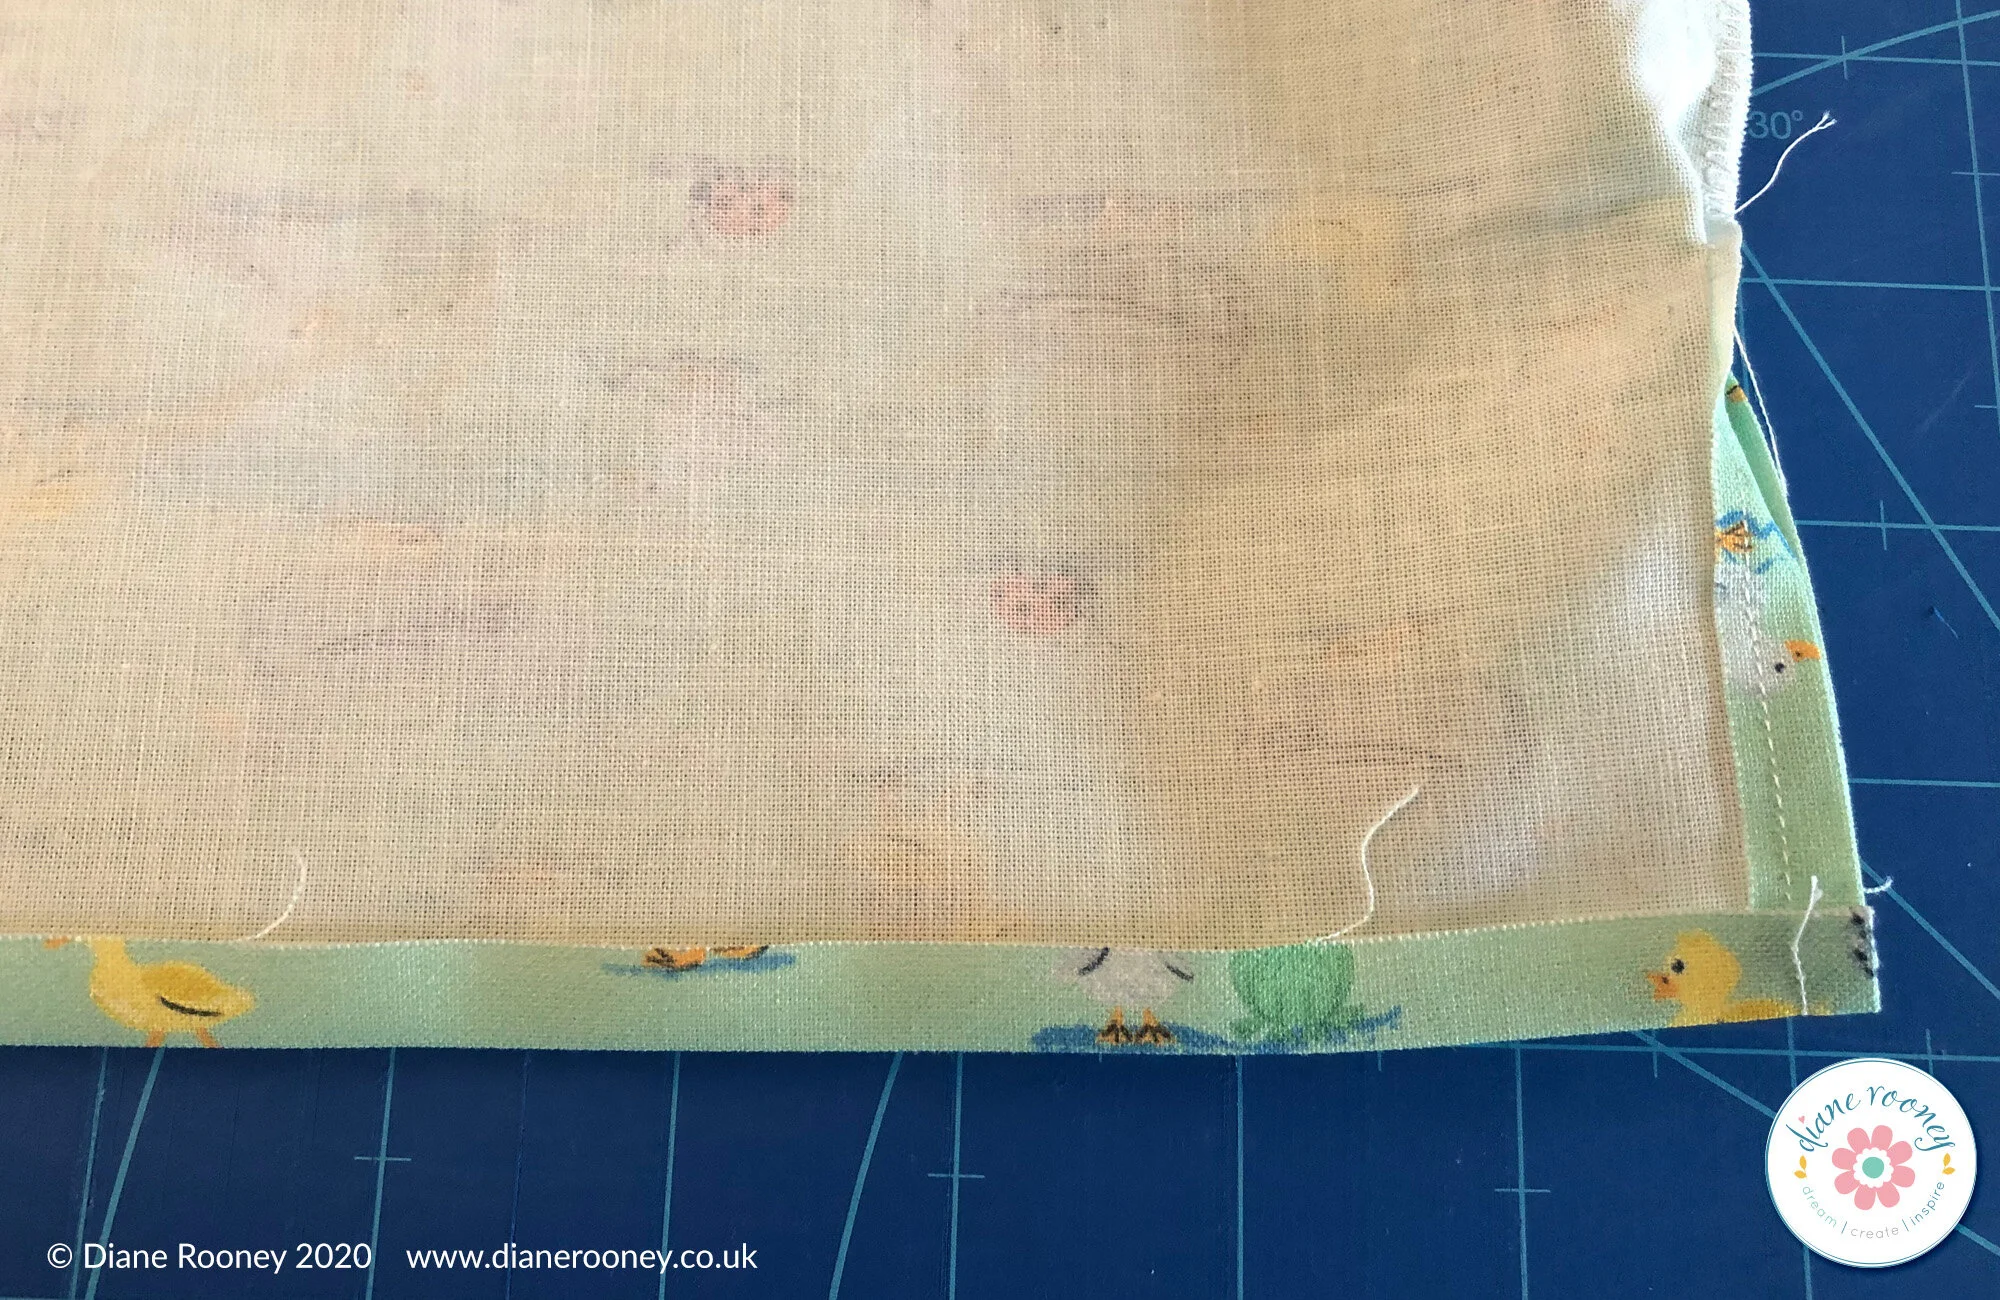
7. Fold the top over again. Press. Fold one more time (about an inch). Pin and sew. See images. This will make the space for you to thread your ribbon through.


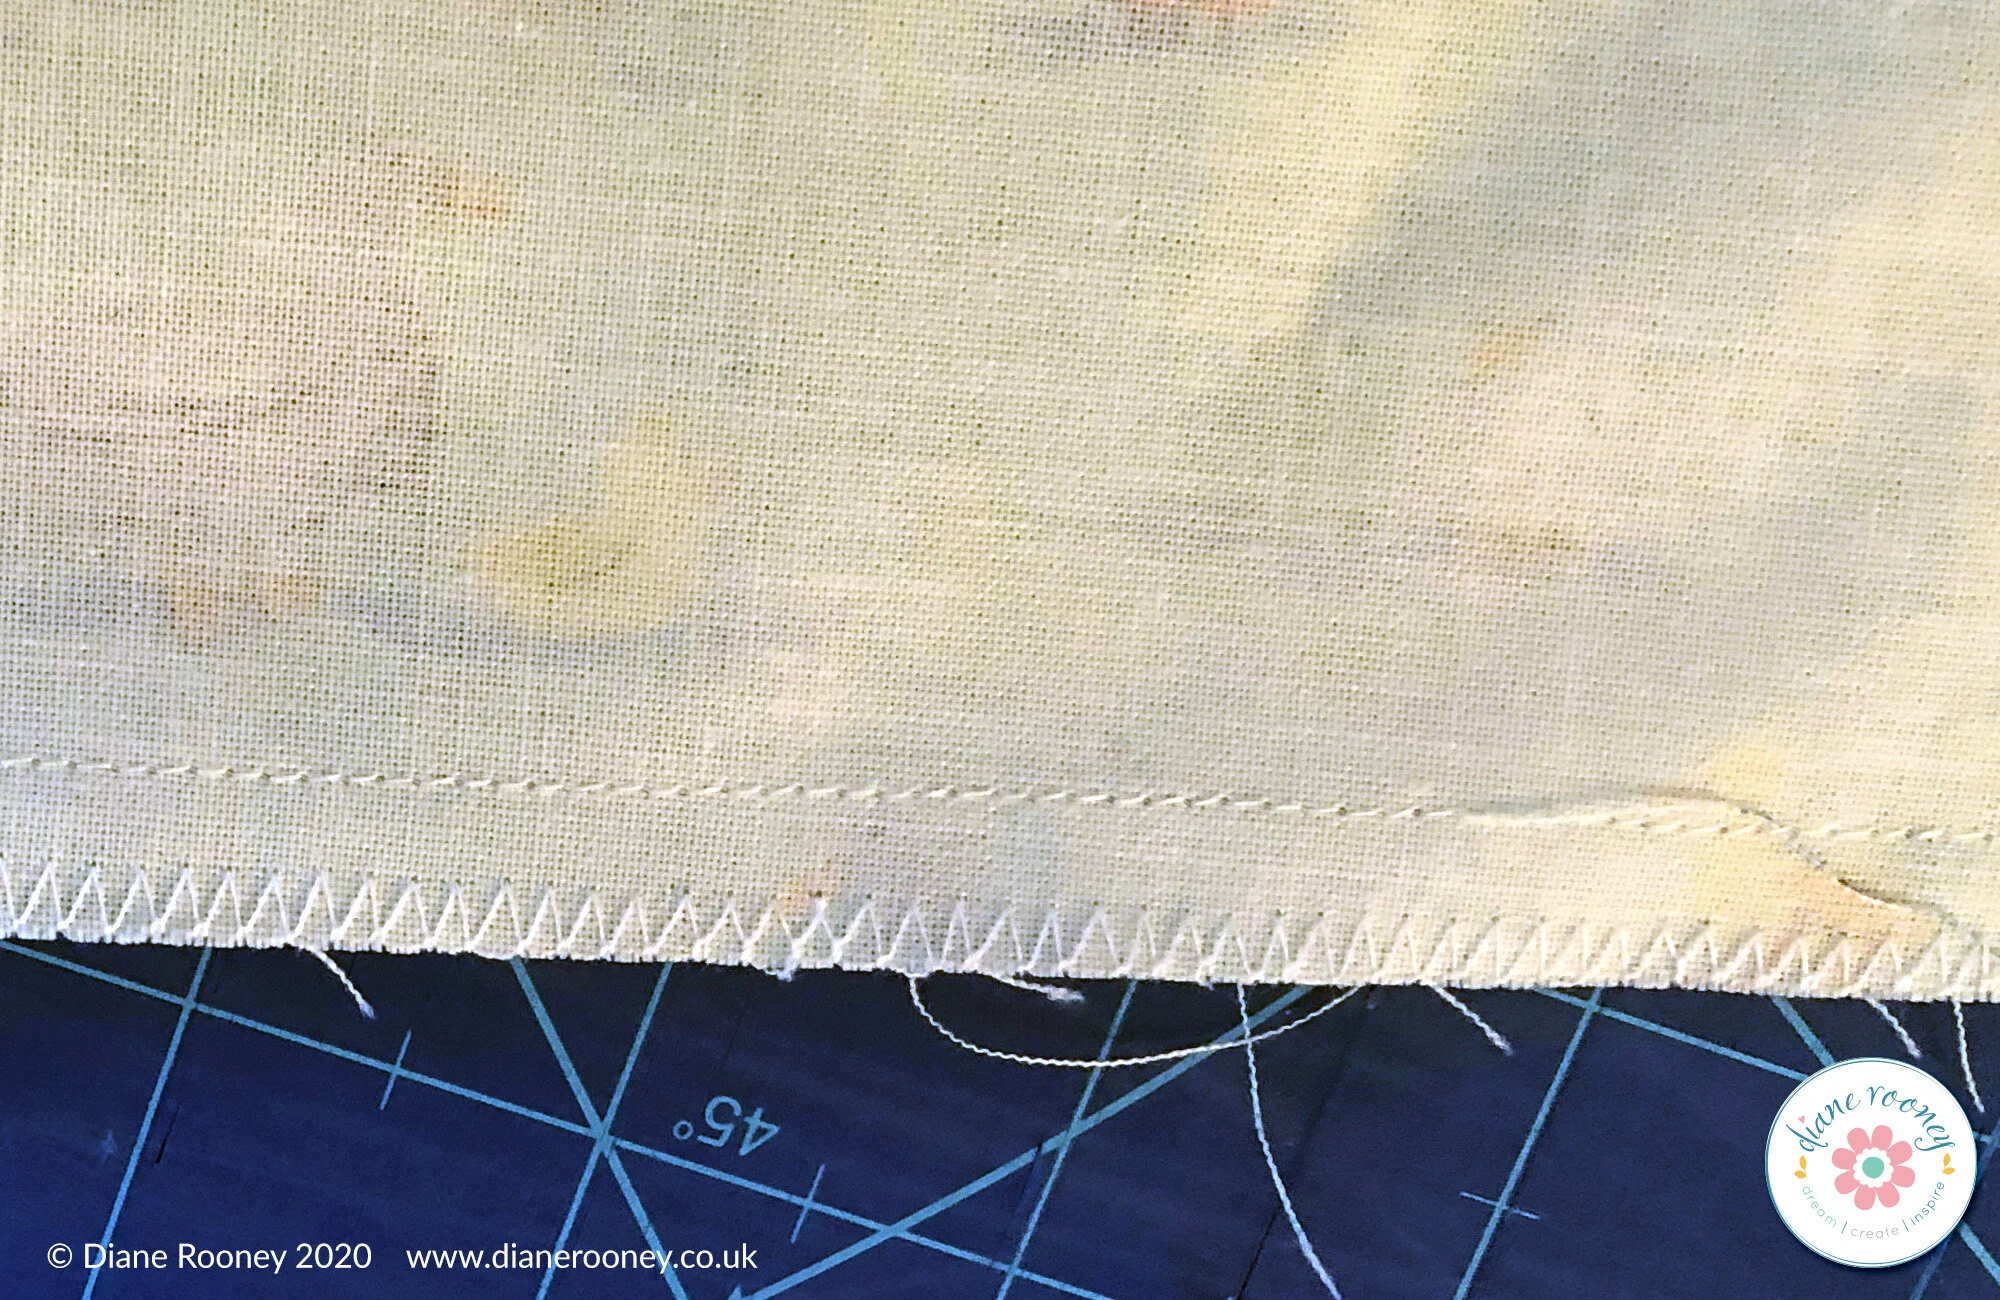
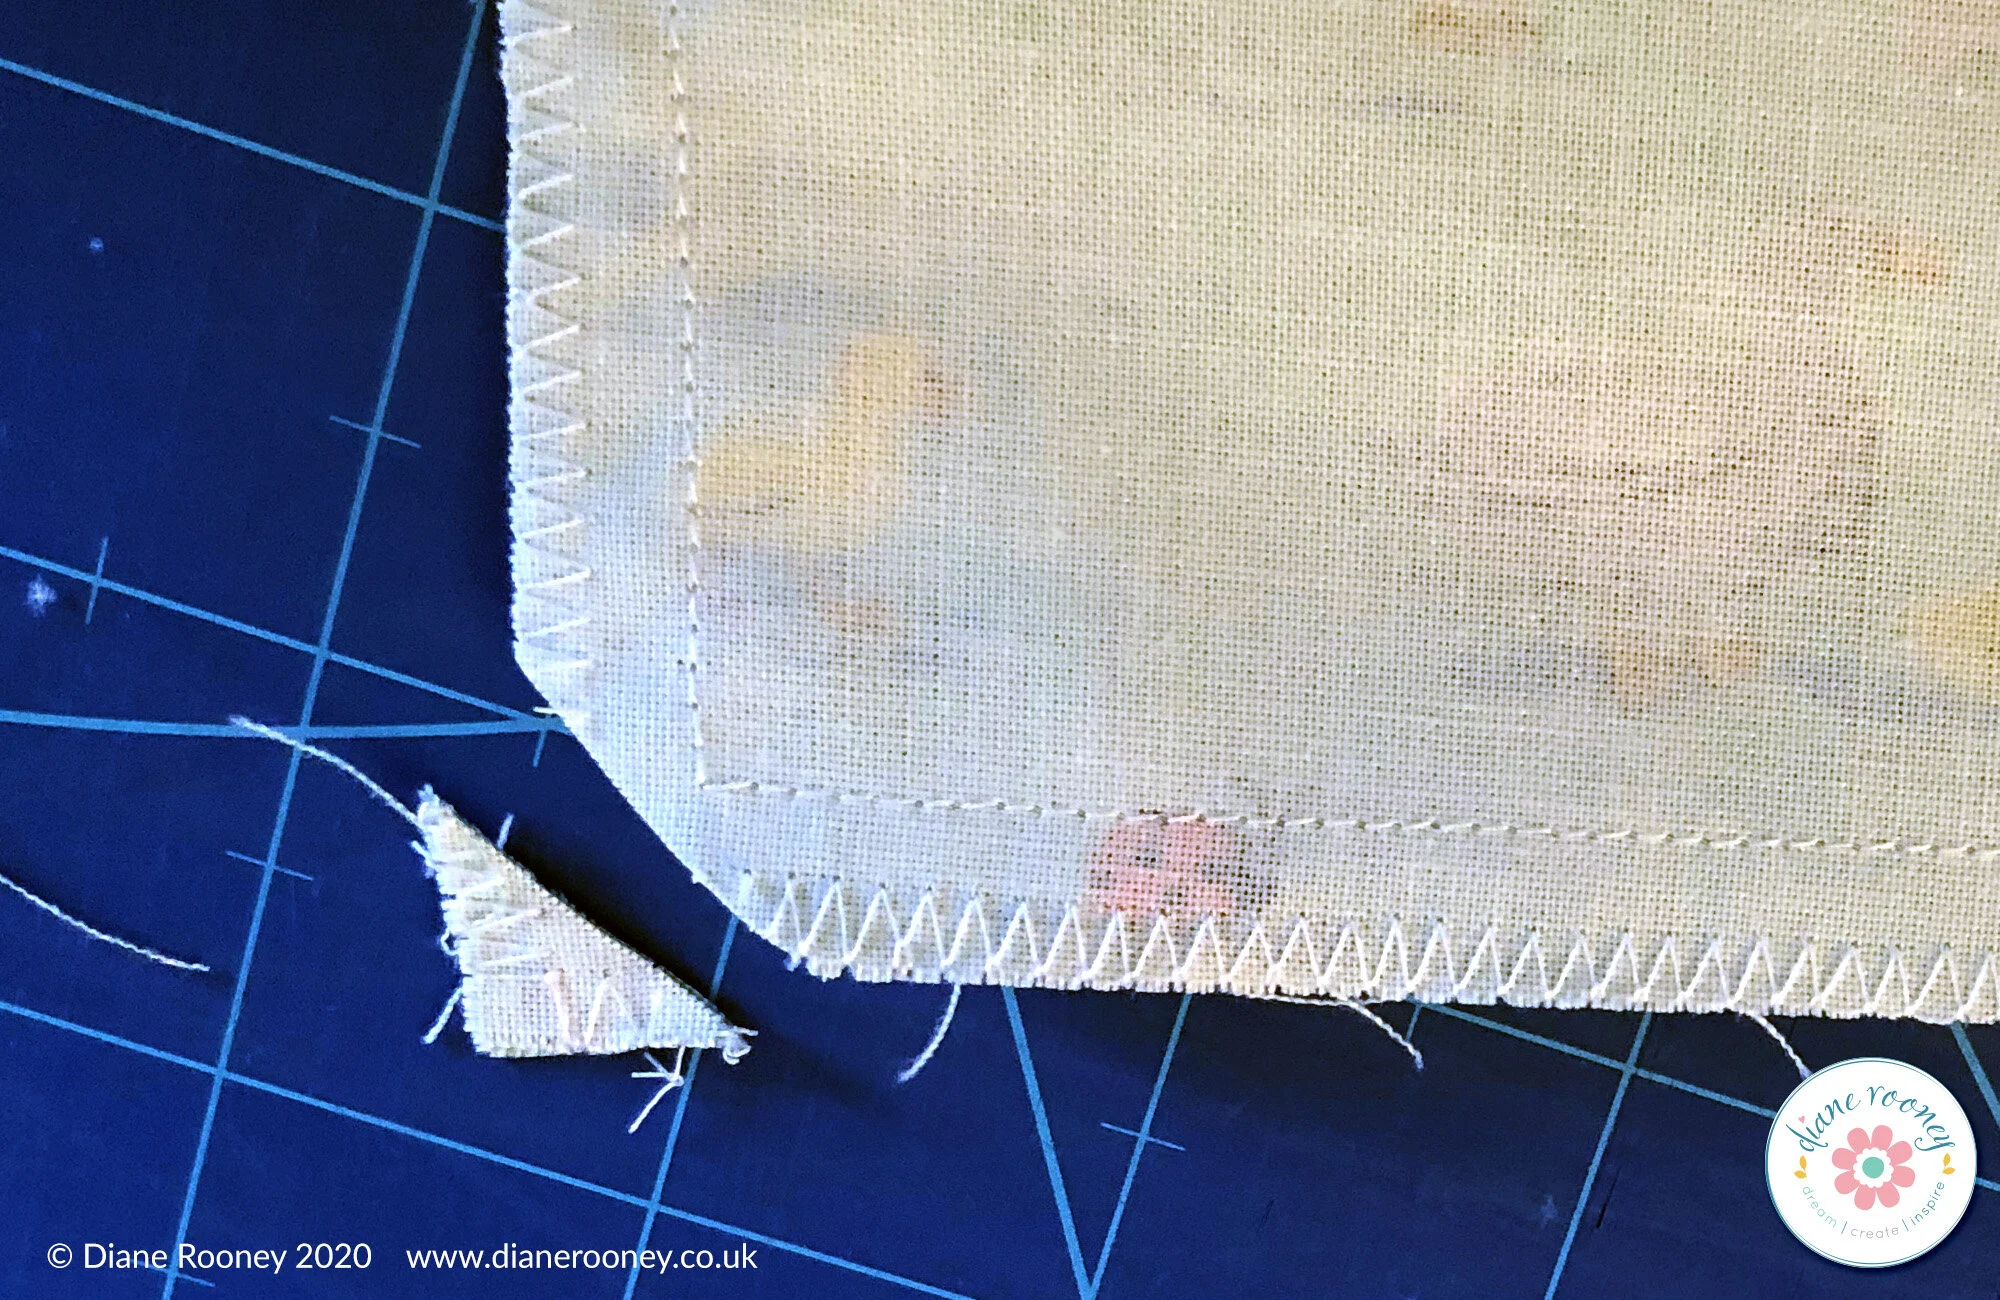
8. Seam finish options. There are a couple ways you can finish off the seam on your bag to help prevent the fabric fraying. I used an overedge foot on my sewing machine. You can also use a zig zag stitch for finishing off the seam. Refer to your own sewing machine manual about both options. Alternatively, you can use a pinking shears.
9. Once you’ve finished off the seams, carefully cut off the excess fabric on the corners. Now turn the bag right side out.
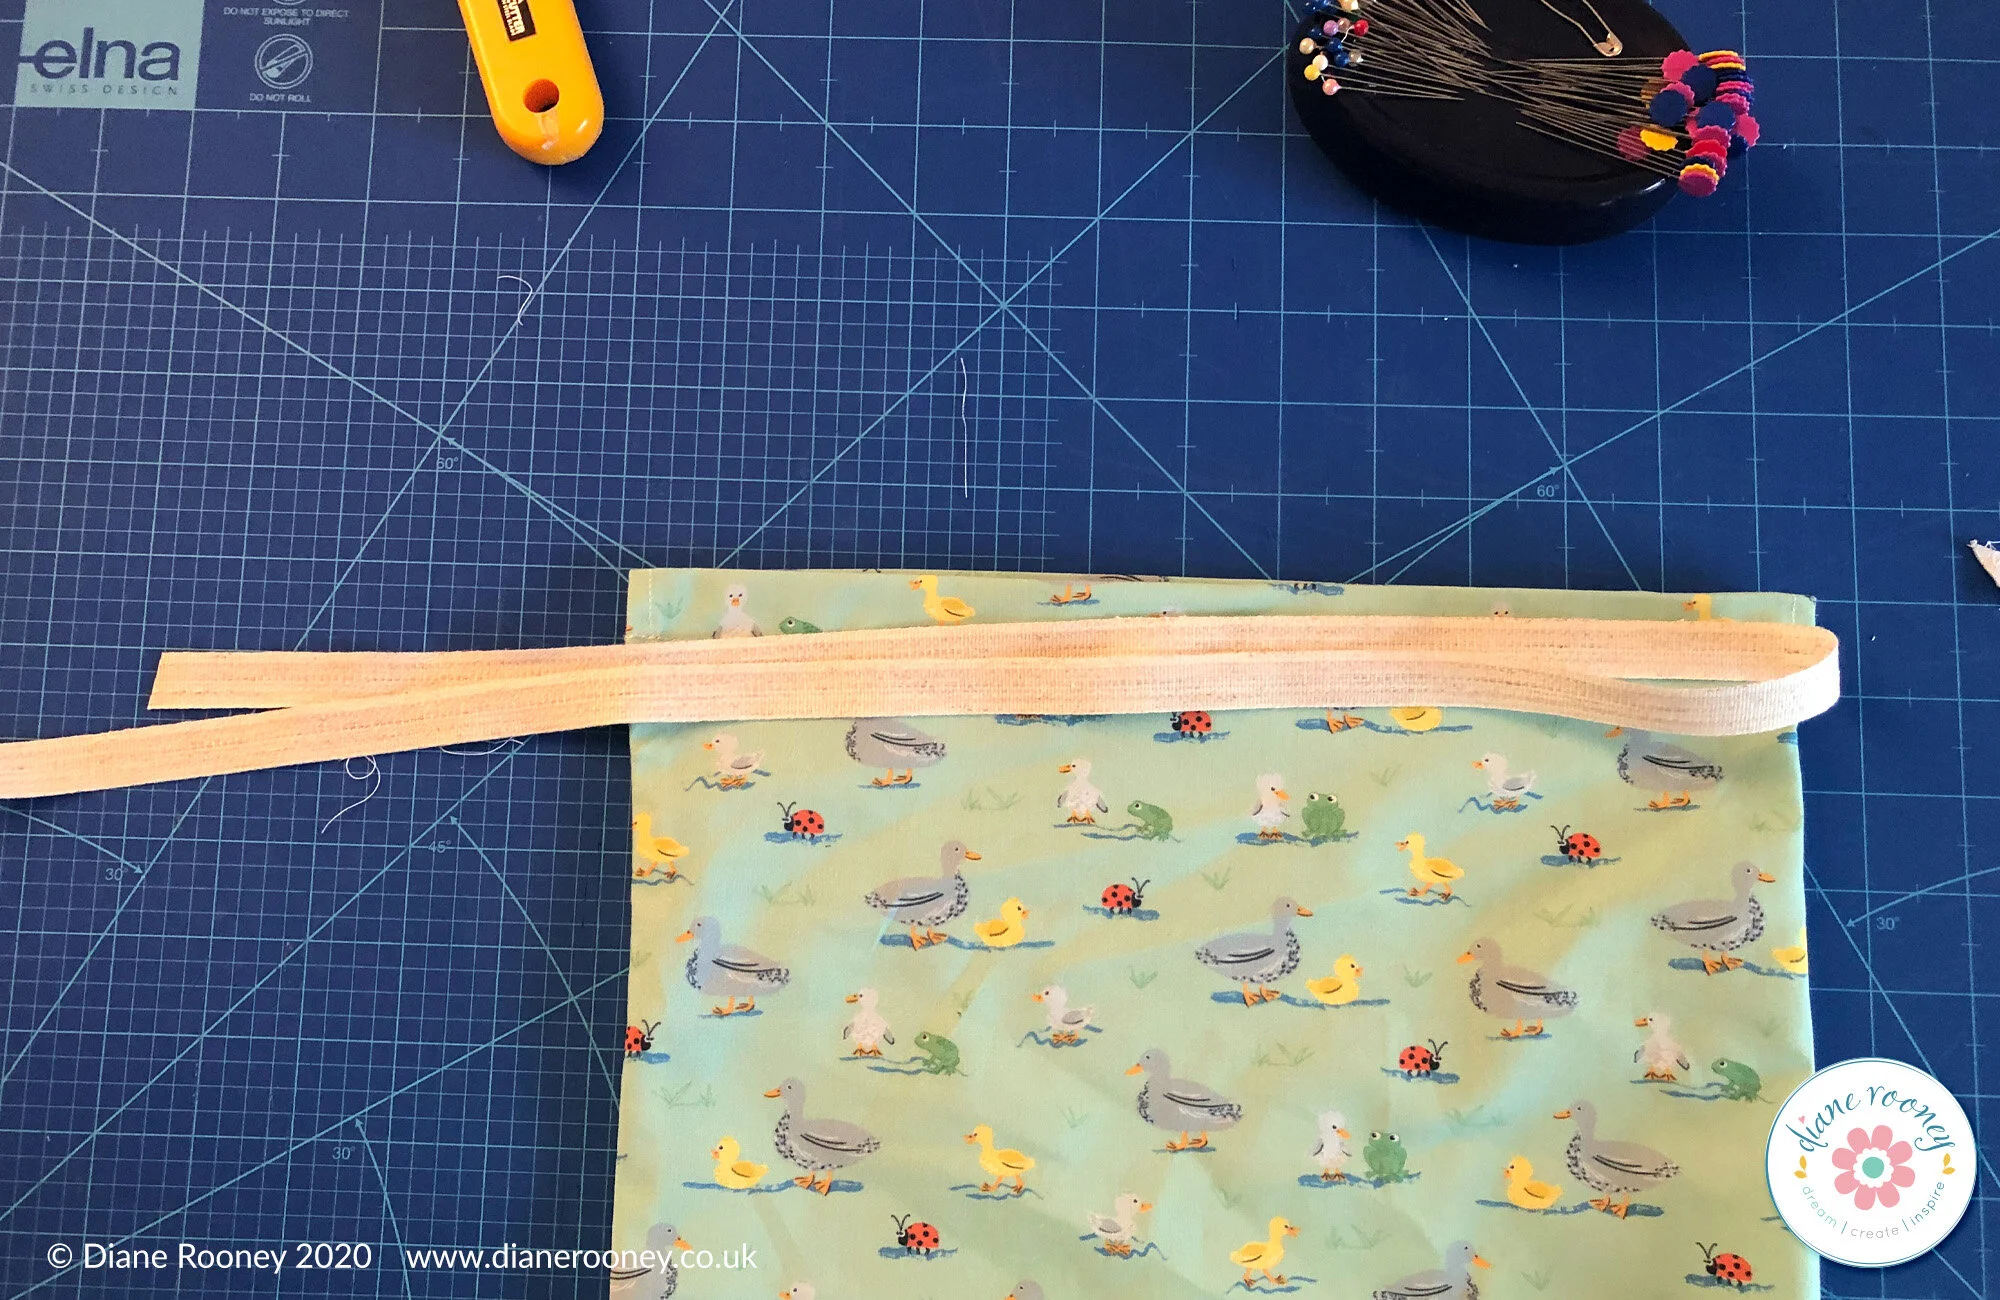
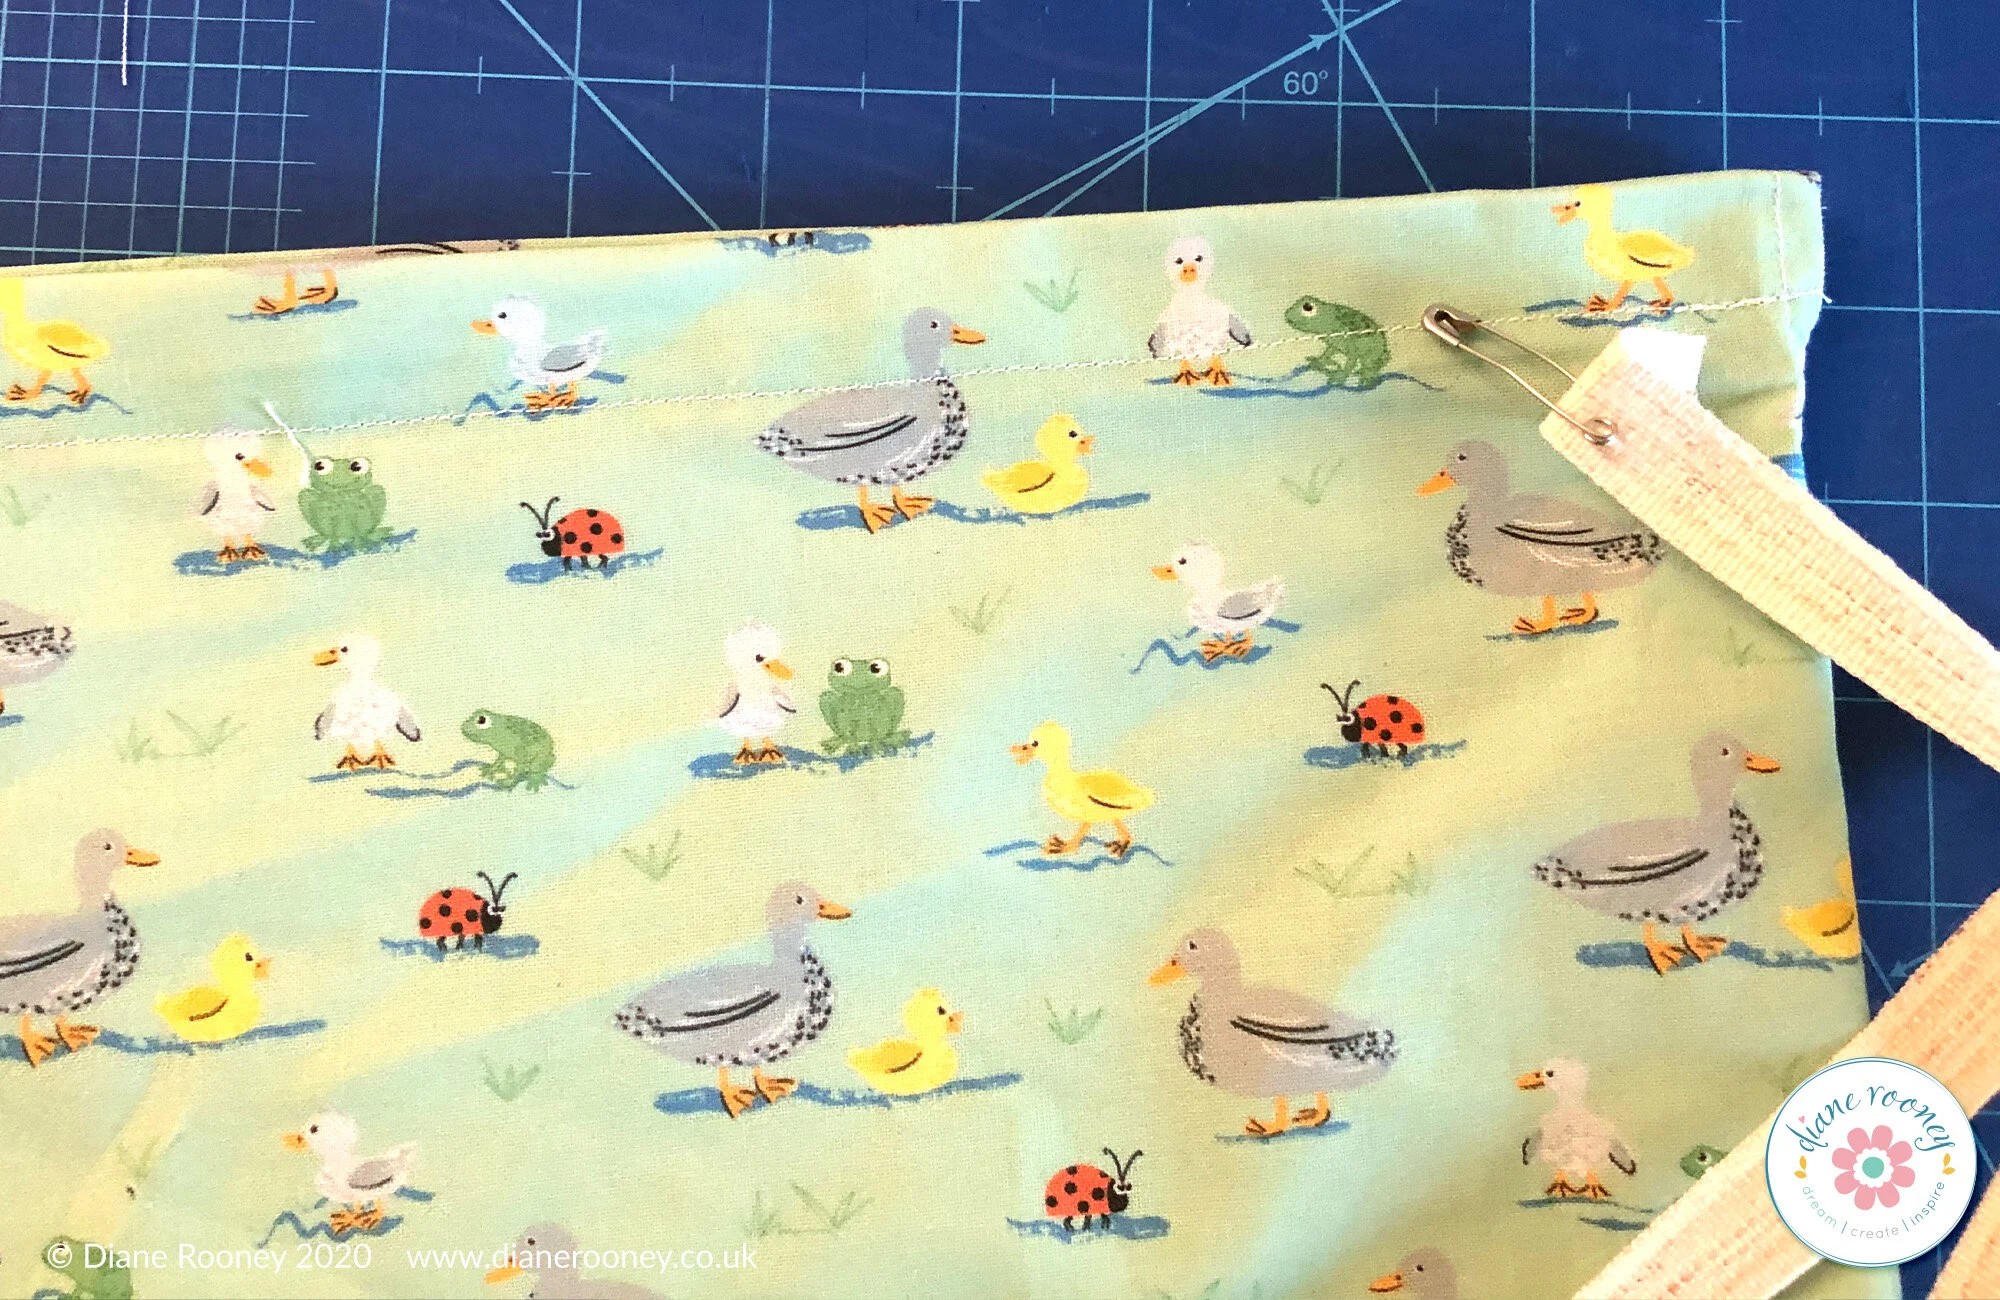
10. Cut a piece of ribbon, cord or similar about twice the width of the bag with a little bit extra for both sides of the opening. Using a safety pin, thread the ribbon through one side and then through the other. Repeat for the other side but start on the opposite side.
11. Tie a knot in the ribbon both sides and you’re done.